
| » Forum Index » Reader's Tutorials » Topic: Creating a Brush |
|
Posted on 10/04/06 3:14:20 PM |
|
rufus
Destructive Demon Posts: 243 Reply  |
Creating a Brush
Open a new document, RGB color, about 500 x 500 pixels, 72 pixels/inch with a white background. On a new layer, use the pen tool to draw the shape of the brush. Here I have drawn a single leaf which I will use to create trees and bushes. When the brush is finished save it as a path. 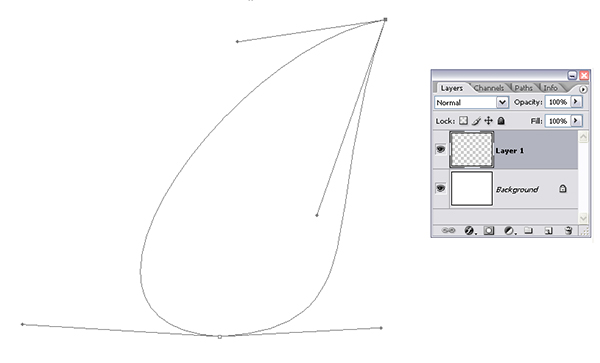
Set the foreground colour to black and with the path selected, fill it with the foreground colour. This will make the brush opaque (see the note below). 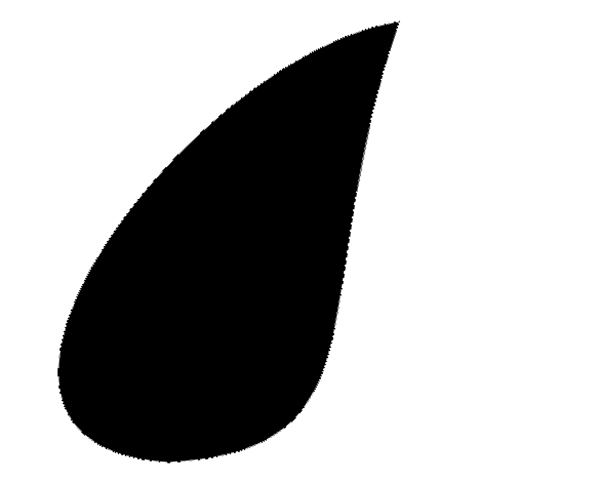
Deselect the path by clicking below it in the palette. Draw a selection around the design with the rectangular marquee tool then choose 'Edit/Define Brush Preset...' naming it as appropriate. This will save the new brush at the end of the brushes palette. 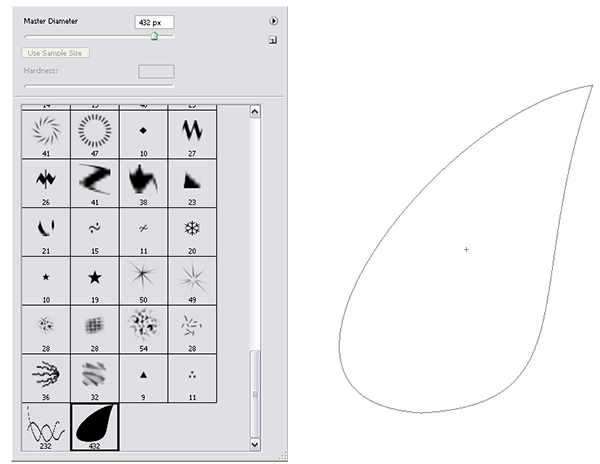
Deselect the design and delete the layer, this is no longer needed. Select the new brush from the palette, set the Foreground colour to medium green and the Background colour to dark green, (as we are creating leaves). Adjust the size of the brush (using the [ bracket or ] bracket ) then draw a line with it. You will see that this repeats the leaves across the screen but they don't look much like the leaves of a tree as the pattern is too regular. To change this the characteristics of the brush must be adjusted. 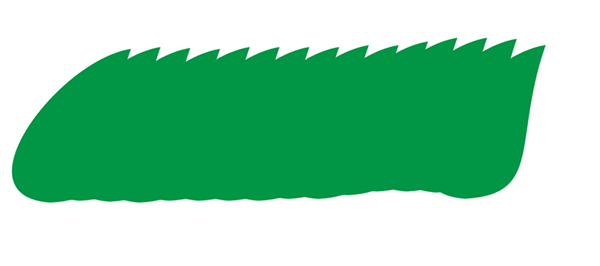
Open the brushes palette (press F5). This gives access to a number of settings to tailor the brush to our needs. Below are settings for the leaf, I have not used others as they are not appropriate for this design. Select 'Brush Tip Shape', Set 'Spacing' to about 75%. This spreads the leaves out. 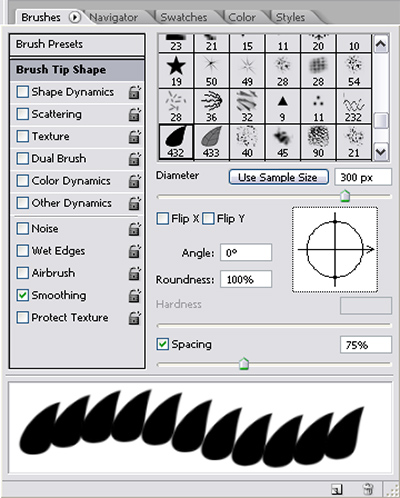
Select 'Shape Dynamics'. Set 'Size Jitter' to 100%, this will randomly change the size of the leaf each time a leaf is drawn, leave the Control as 'Pen Pressure'. Set 'Minimum Diameter' to about 25%, this will prevent any very tiny leaves being drawn. Set 'Angle Jitter' and 'Roundness Jitter' to 100% and 'Minimum Roundness' to any value. This will give a lot of variety to the position and shape. Also select 'Flip X Jitter' and 'Flip Y Jitter' for even more variety. 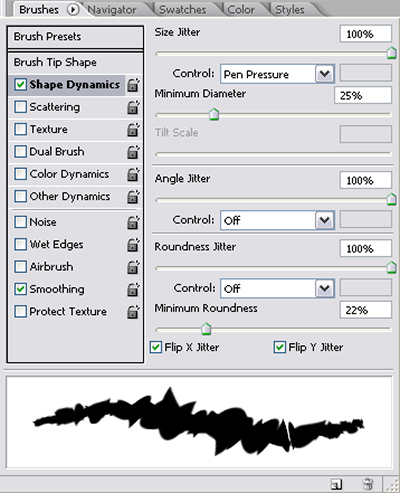
Select 'Scattering' Set 'Scatter' to about 300% to 350%, 'Count' to about 3 and 'Count Jitter' to about 85%. This gives a random scattering of the leaves. 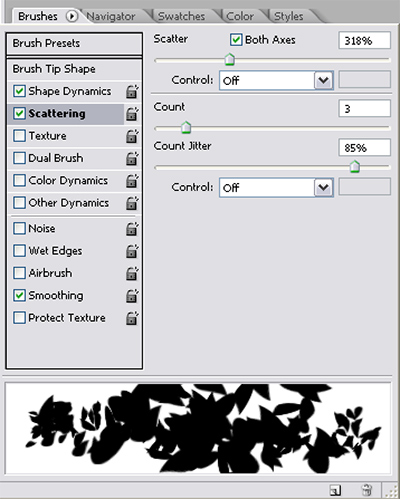
Select 'Color Dynamics'. Set 'Foreground/Background Jitter' to 100%, this will allow all colours between the foreground and background to be used. Set the 'Hue, Saturation and Brightness Jitters' to low values to retain appropriate colours (in this case greens) but give some variety. 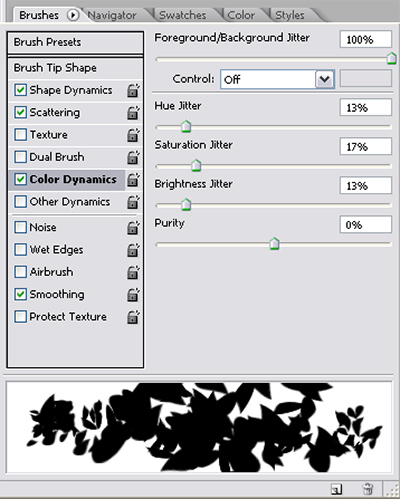
Now you can try it out. On a new layer draw with the brush and you should see each leaf changing in size, position and colour, all of which can be varied by adjusting the above settings. Change the foreground and background colours and on a new layer add more leaves to give depth. 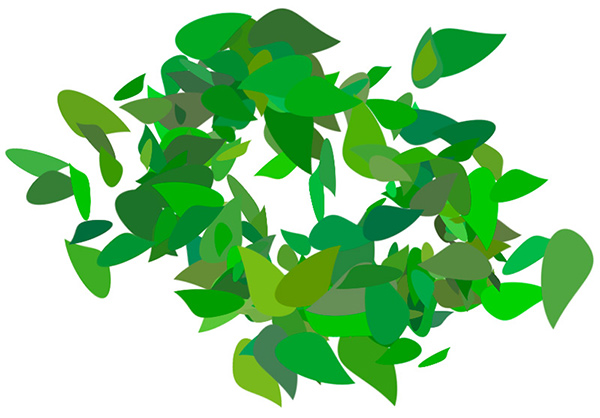
Any brush can be adjusted in this way to give you complete control. Note: When the brush was created it was filled with black. This means that when it is used it will fill its' shape with the Foreground/Background colours at 100% opacity. If the brush was filled with 50% grey, it would fill its' shape with 50% colour. This also means that a brush can have more than one opacity by adding further shapes on different layers thus enabling the creation of brushes with embedded designs. 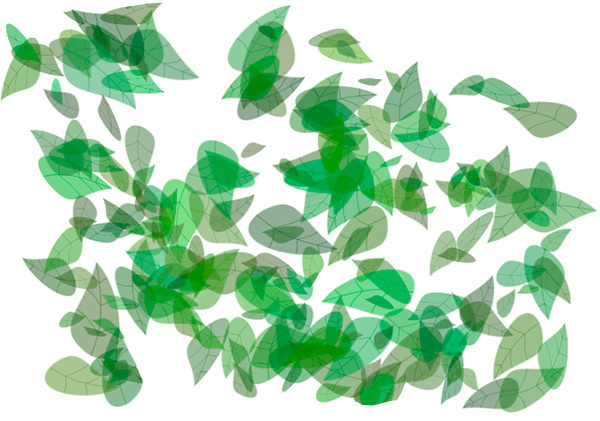
rufus |
Posted on 10/04/06 8:08:23 PM |
|
tank172
ThreeDee Thriller Posts: 692 Reply |
Re: Creating a Brush
wow! That was really helpful! Thanks Rufus! |
Posted on 10/04/06 8:57:52 PM |
|
chris
Photo Parodist Posts: 138 Reply |
Re: Creating a Brush
Thats really cool rufus! But i didnt understand the embedded design bit? Are the veins on the leafs created using a dual brush? or by some other method? |
Posted on 11/04/06 06:44:12 AM |
|
Bob
Expert Expressionist Posts: 130 Reply |
Re: Creating a Brush
No need for a dual brush tip. Instead of filling the selection in black he filled it with 50% gray and painted the veins using a darker shade of gray. Then he defined the brush. When you define a brush tip, an internal grayscale image of the tip is created. The grayscale value at each pixel position within the tip defines the opacity that the brush color will be painted at that position -- black will be 100% painted while white will be 0% painted. This type of opacity is not the same as layer opacity. |
Posted on 11/04/06 08:05:03 AM |
|
maiden
Golden Gif Gagster Posts: 471 Reply |
Re: Creating a Brush
Excellent tutorial Rufus very incisive. |
Posted on 11/04/06 09:24:38 AM |
|
Steve Caplin
Administrator Posts: 6838 Reply |
Re: Creating a Brush
Yes, a very good example of how it's done. Creating brushes is something I've never addressed in the book - perhaps the next edition! |
Posted on 11/04/06 10:52:36 PM |
|
Pierre
Constructional Confabulator Posts: 637 Reply |
Re: Creating a Brush
This is very helpful. A co-worker showed me this and I actually used it in my las Friday Challenge to create grass at the bottom of my wall, behind the car. It works very well for random thinks like grass, leaves, rocks (gravel), snow flakes, rain, bucket of peanuts. I particularly like the "2 tone" effect. I did not think of that! I said it before, this forum is the greatest! (and so is this tutorial) _________________ |
Posted on 27/07/06 9:37:50 PM |
|
David Urquhart
* Posts: 37 Reply |
Re: Creating a Brush
Ain't got a clue what I am going to use this on, but you can be sure it will feature sometime soon, I love it. Thank you. _________________ Corners are just bent straight bits. |