
| » Forum Index » Reader's Tutorials » Topic: Creating and Mixing Fall colors using Elements4. Part 2 |
|
Posted on 20/06/06 01:40:04 AM |
|
michael sinclair
Off-Topic Opportunist Posts: 1754 Reply |
Creating and Mixing Fall colors using Elements4. Part 2
1. make sure that the tree is on its own transparent layer. 2. Using the selection Brush (cuts out the Photoshop quickmask middleman) brush in the exposed trunk. 3. From the main menu click Select and click Inverse to edit the foliage only. 4. From the main menu click Enhancement, and select Variations: 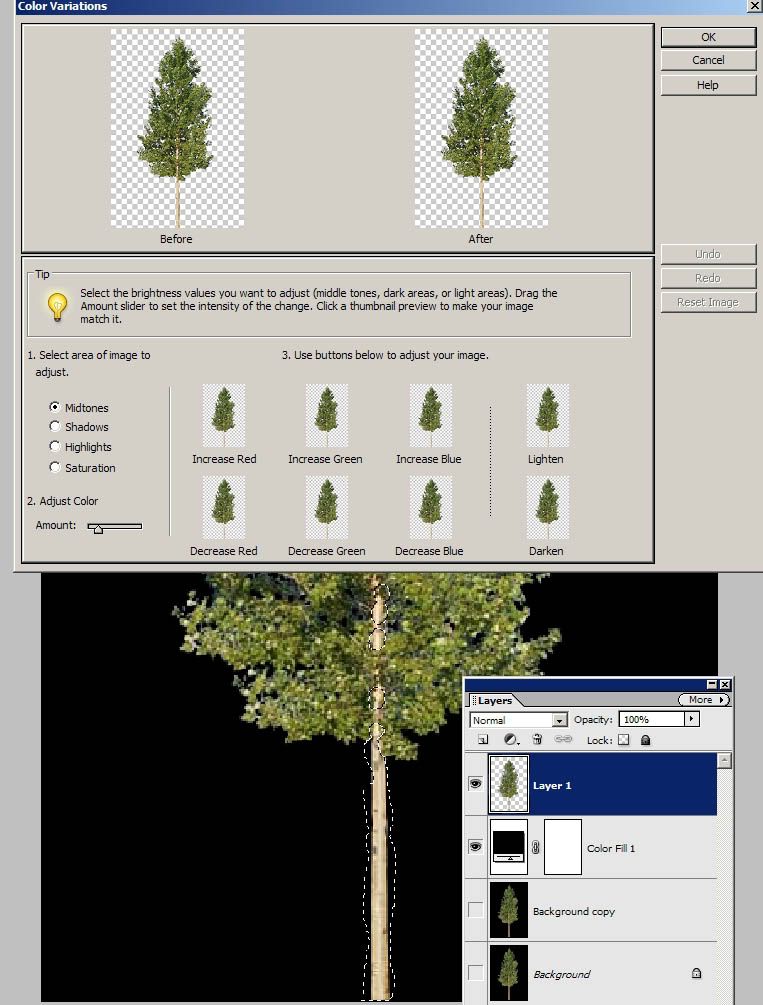
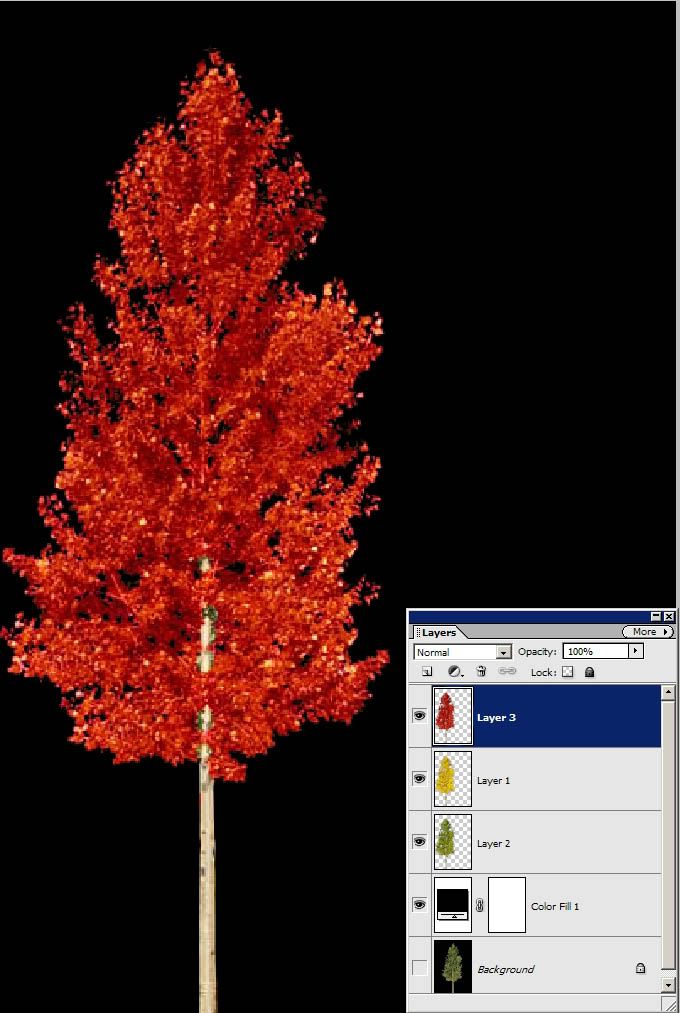
5. With the slider moved towards the left click on the "Increase Red" panel as many times as necessary to achieve a red foliage: 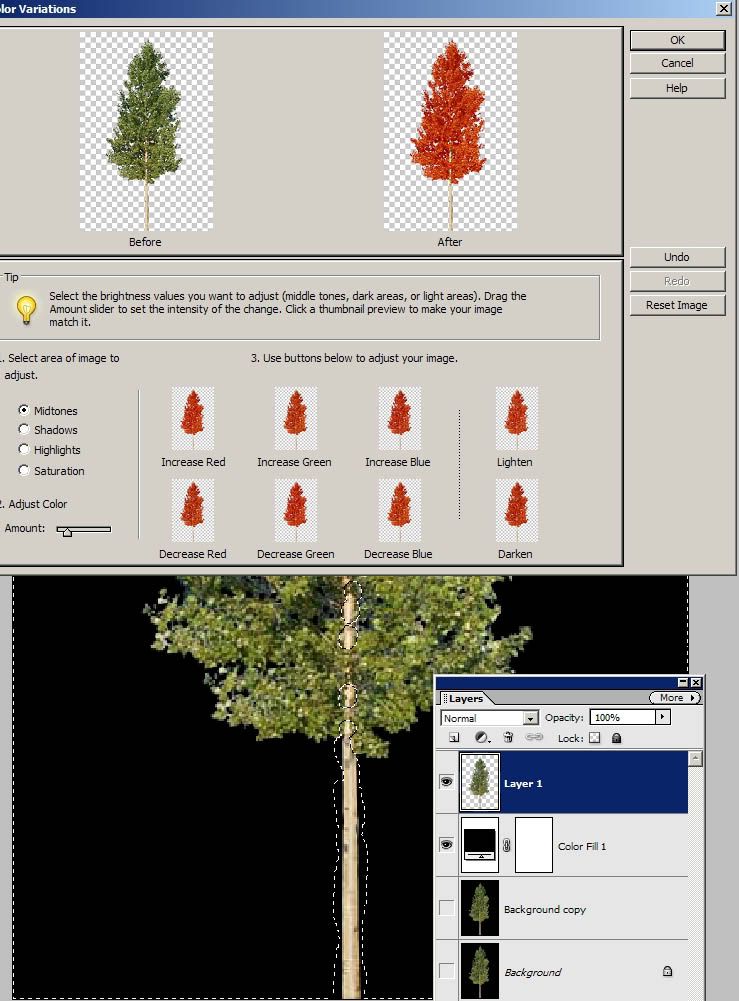
6. Fine tune by increasing contrast: 
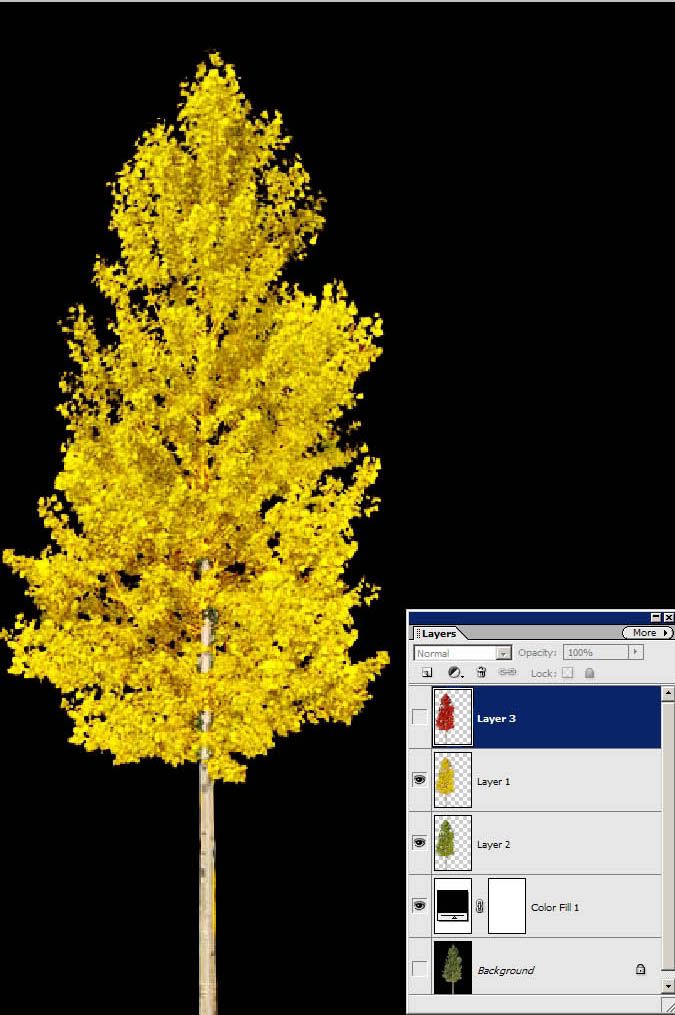
7. At this point save this file as a PSD, as it will it be required with its transparency. 8. Before clicking on the "Undo" button to revert to the original "Summer" tree (on its own transparency of course), select Enhancements from the main menu, then click on Colour Adjustment, and select Adjust Hue/Saturation. 9. drag the Hue slider to about a value of 30, and you will get (need red foliage to start with) a stunning gold colour. 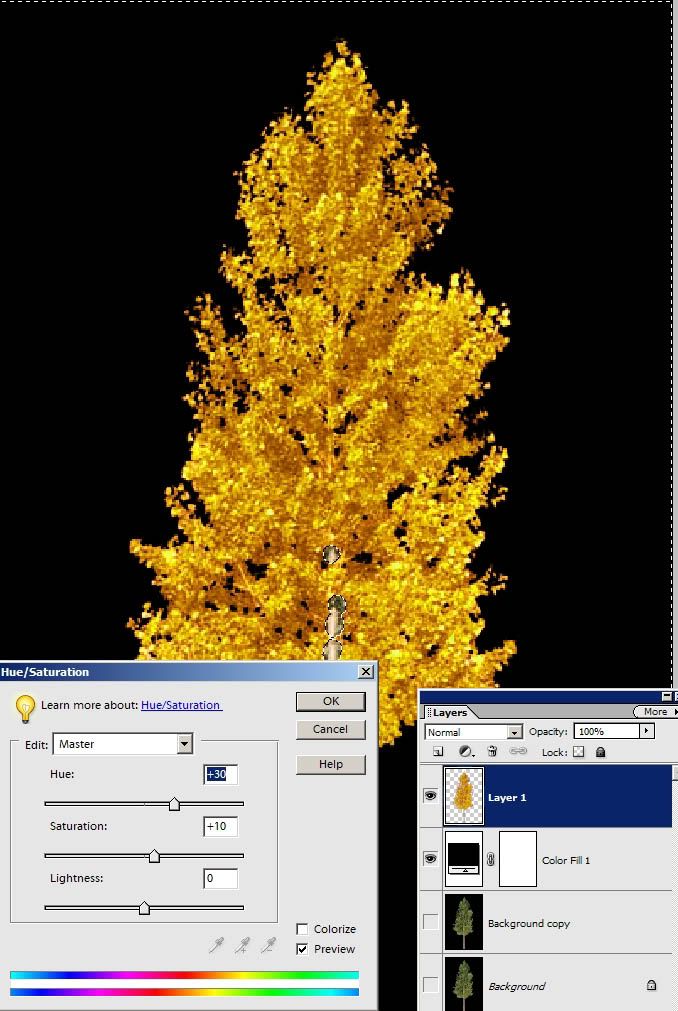
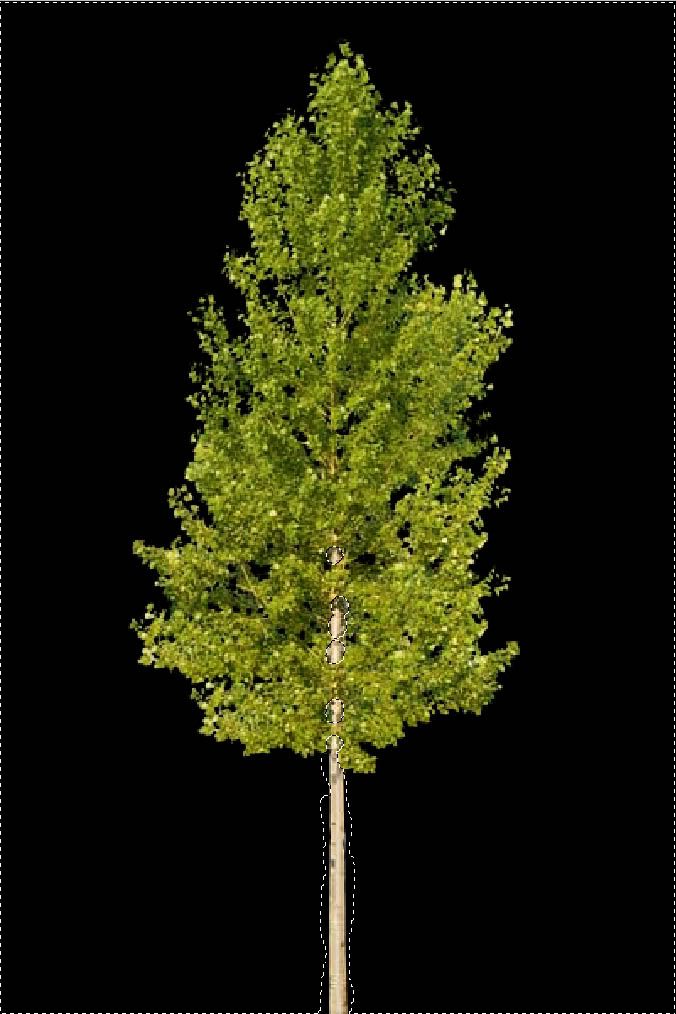
10. Fine tune using the contrast: 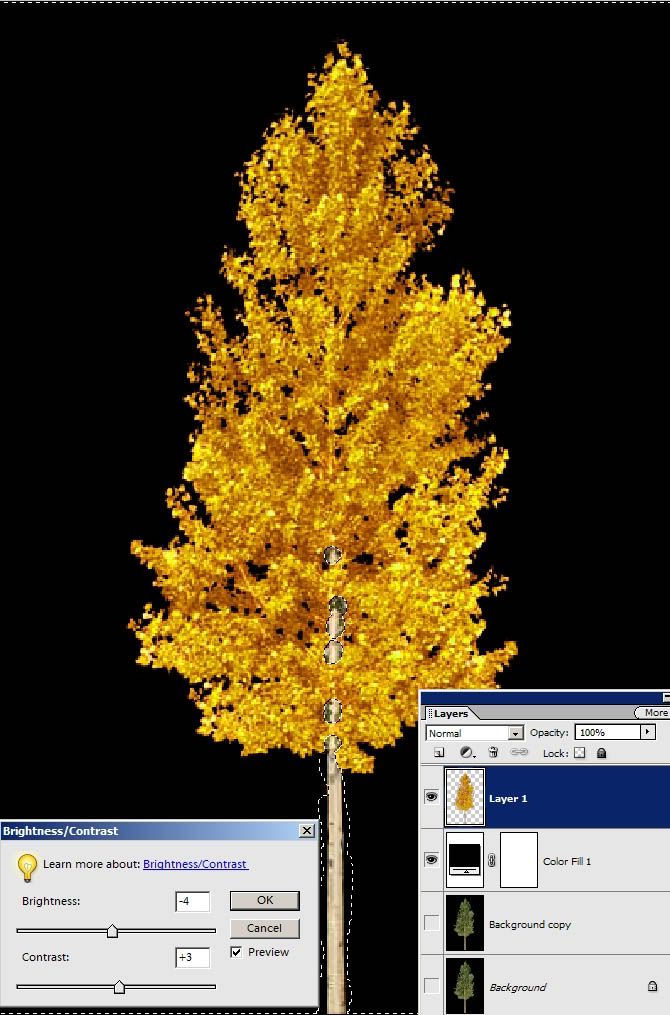
11. Either click on the "Undo" button to revert to the original summer tree, or open the saved PSD file: 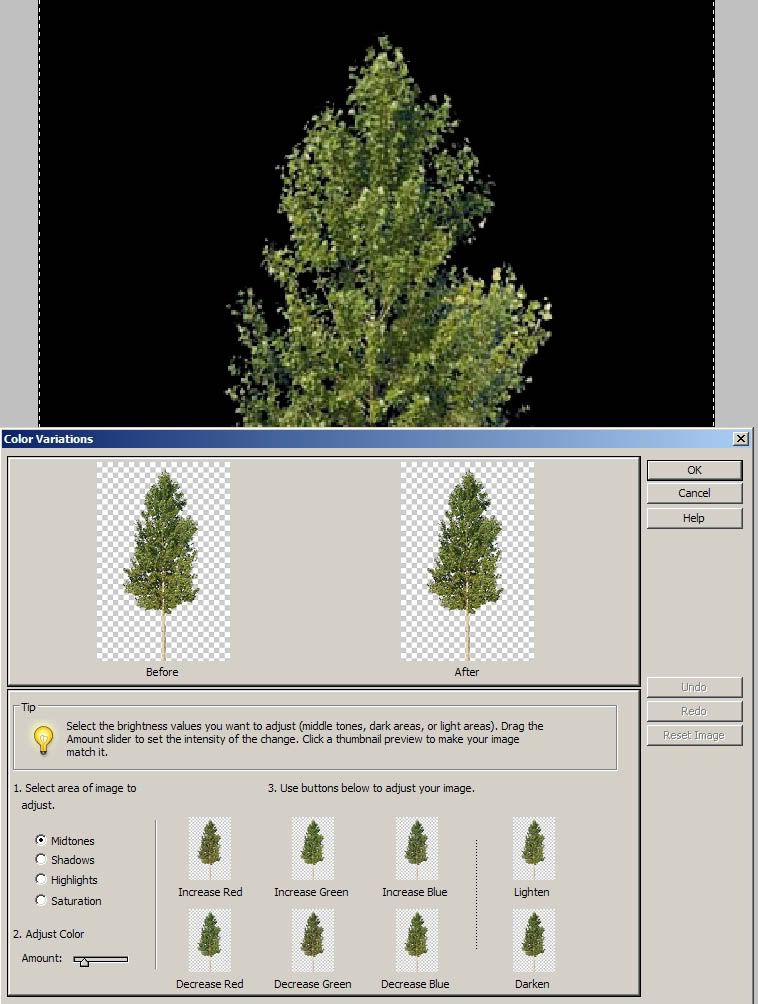
12. Select Variations again, and this time click on the "Decrease Blue" panel three or four times to make a light green foliage ( just before it turns yellow sort): 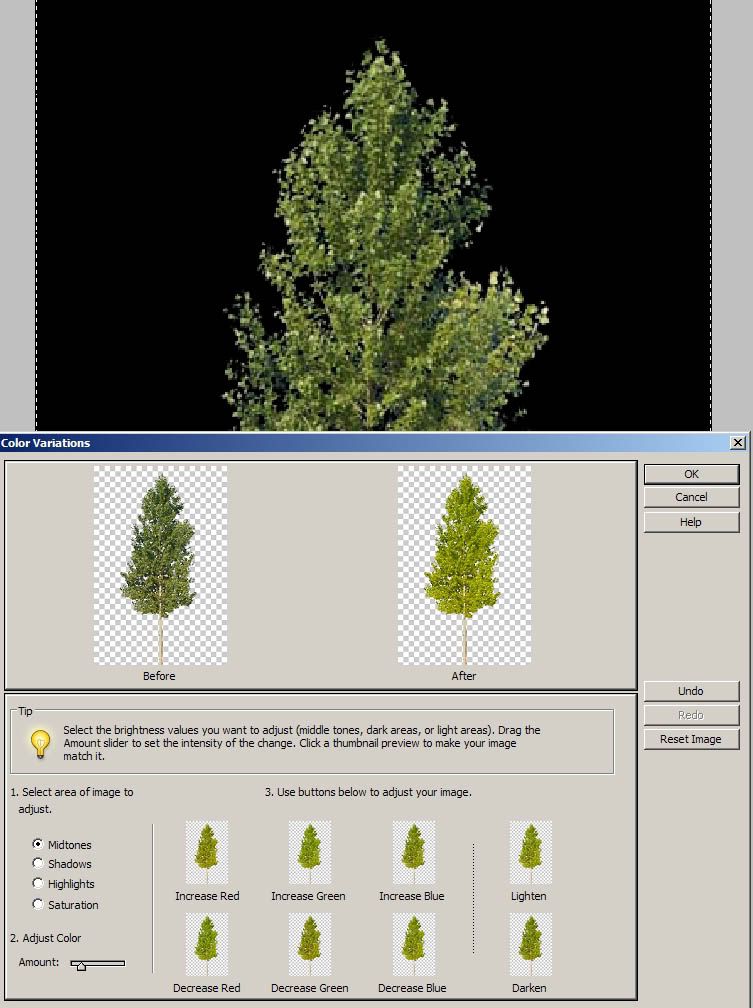
13. Next you create the Yellow foliage by again first reverting to the Basic summer green foliage. 14. With the basic Summer green foliage reverted, select the Variations again and this time continue to click on the "Decrease blue" untill you see yellow emerging. If the Yellow requires enriching then also click on the "Increase Red" panel twice: 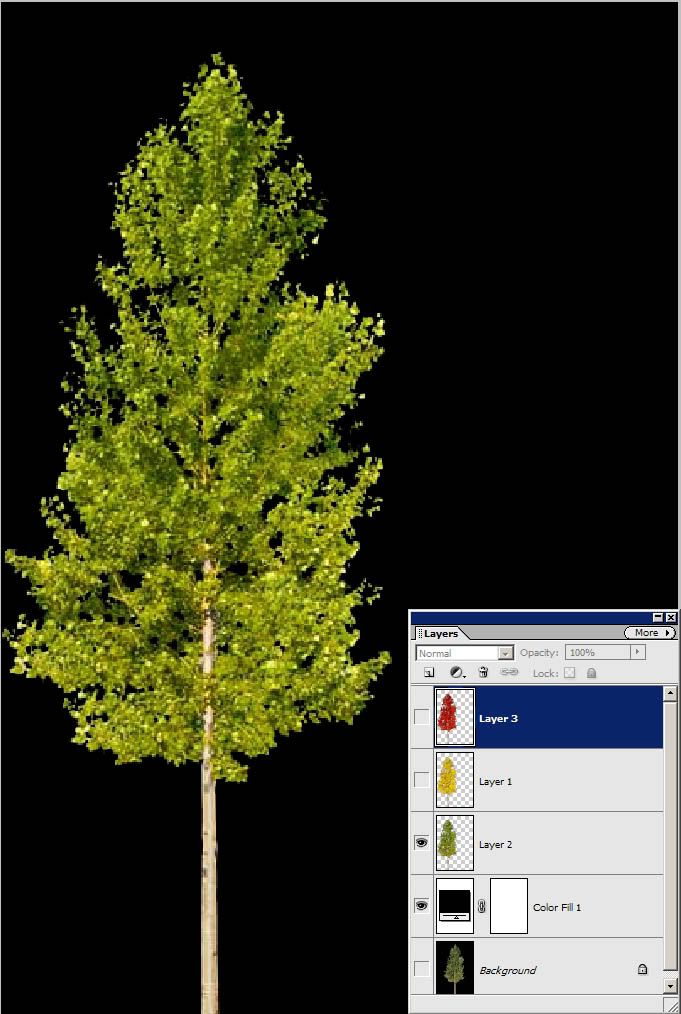
15. As you can see all three colours( light green, yellow, and red) have been copied over on to their separate layers. All have the "Eye" symbol showing. 16. Make the top layer (Red foliage) active. 17. Select the Eraser tool and choose a very soft brush. 18. set the Opacity value to around 50%. 19 Start brushing on the Red foliage and the layer just below (Yellow foliage) will gradually start to show: 
20. Next, make the Yellow foliage layer below the Red foliage active: 
21 repat the process of brushing and you will see the green emerge. 22. finally, deselect the Black colour fill layer and merge visible before selecting the black fill layer again. 23. It's always agood idea to align the tree dead- centre and with the trunk on the baseline or bottom of the image. Then save as a PSD. and that's it: 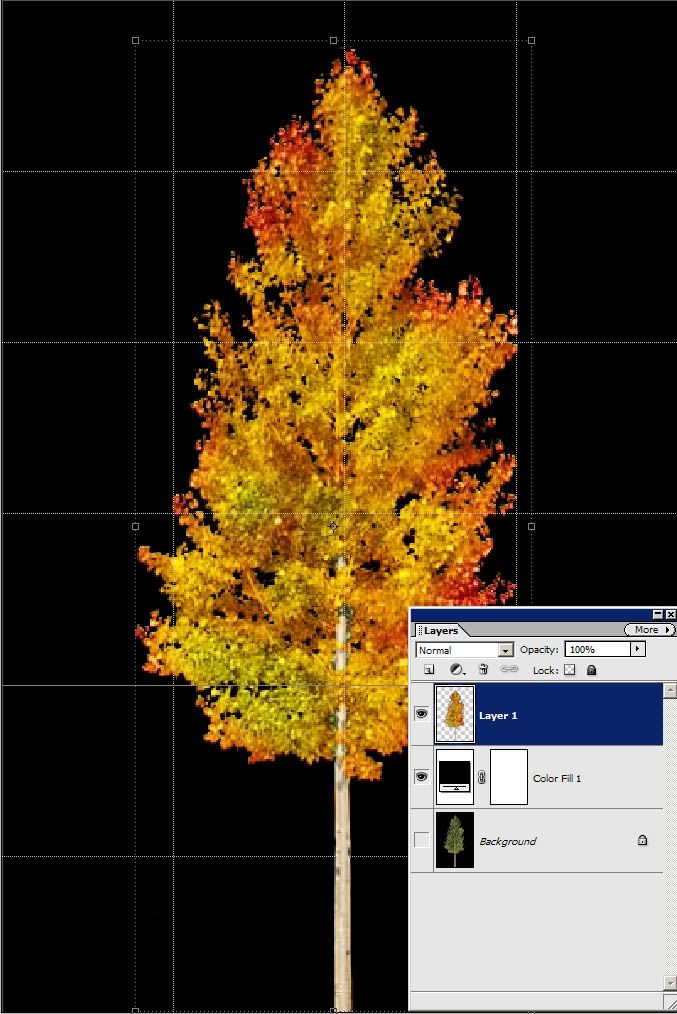 _________________ Just because I've read a book doesn't mean that I know what I'm talking about...sigh! |
Posted on 20/06/06 09:23:18 AM |
|
Steve Caplin
Administrator Posts: 6838 Reply |
Re: Creating and Mixing Fall colors using Elements4. Part 2
Excellent technique! I especially like the variegated leaf colours. |