
| » Forum Index » Reader's Tutorials » Topic: Masks: the Monster un-Masked |
|
Posted on 08/02/07 1:39:56 PM |
|
michael sinclair
Off-Topic Opportunist Posts: 1754 Reply |
Masks: the Monster un-Masked
INTRODUCTION A twenty-seven-image pictorial tutorial for anyone who wants a clearer expose on the basics of Masks; and for anyone who also wants proof that its simple, simple, simple! However a basic working knowledge of Layers is required Clicking on the link of each image will give you a larger image (1024 x 76  on your computer which enable you to see un- obscured detail on your computer which enable you to see un- obscured detail
There are only two keyboard shortcuts to remember in this tutorial: 1. To switch between the Foreground colour BLACK and the Background colour WHITE alternate between the D key and the X key. 2. The Alt + click move. I write this tutorial in the knowledge that there are others beside me who are tripped-up by having to assimilate and disentangle the two sets of keyboard commands (one for Mac and the other for windows) while having to anchor the concept of the much repeated mantra that Black conceals and White reveals in a limited or restricted number of diagrams which omit the absolute beginning of the masking process and its logical conclusion on the assumption that you are able to absorb much through osmosis. As you might expect this tutorial takes a rather different approach than that normally used in other booksI never say Paint in Black or Paint in White because as far as the normal Layer is concerned you never do. It is most important that this distinction is made. Instead you use the Paintbrush Tool in BLACK Foreground Colour, or you use the Paintbrush Tool in WHITE Foreground Colour THE TUTORIAL In the Beginning Question: Whats the difference between the Eraser tool and the masking process? Answer None! Except that you use the Paintbrush Tool with the foreground colour set to BLACK, and then click on the Layer Mask icon at the bottom of the Layers palette. Lets start from scratch: 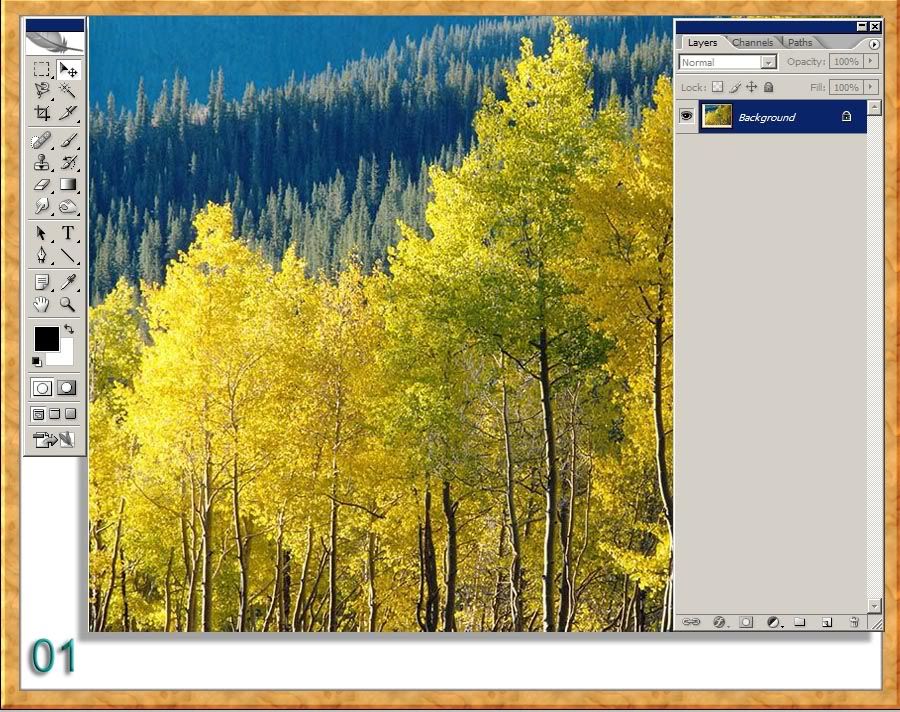
We need to make the locked background layer into a regular one so that formatting and transparency are enabled, so right-click on the blue ( active ) background layer in the Layers palette, and select new layer from background from the drop-down menu. See image 2: 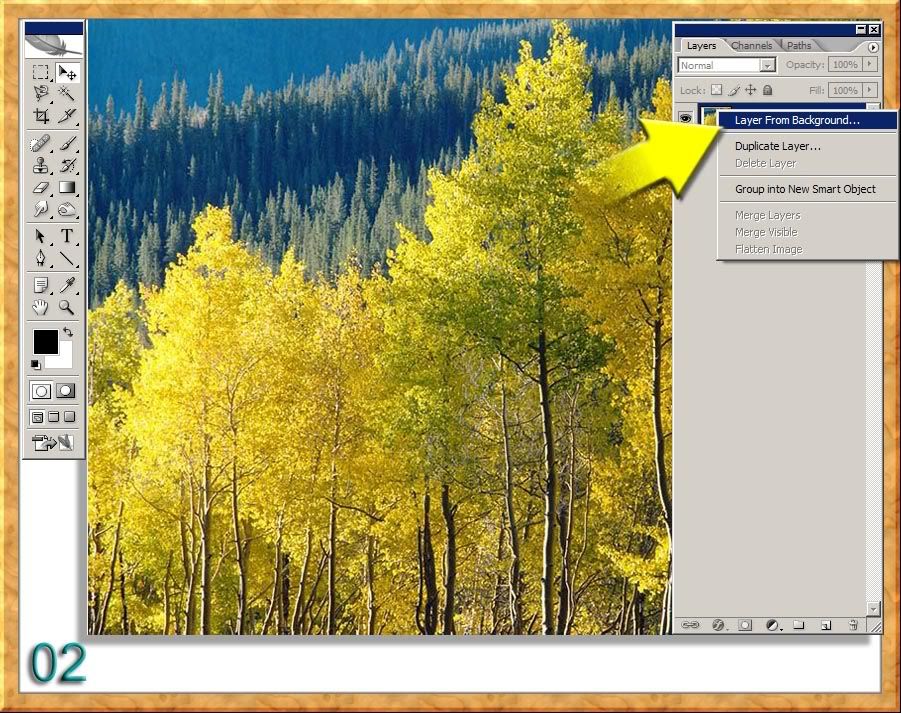
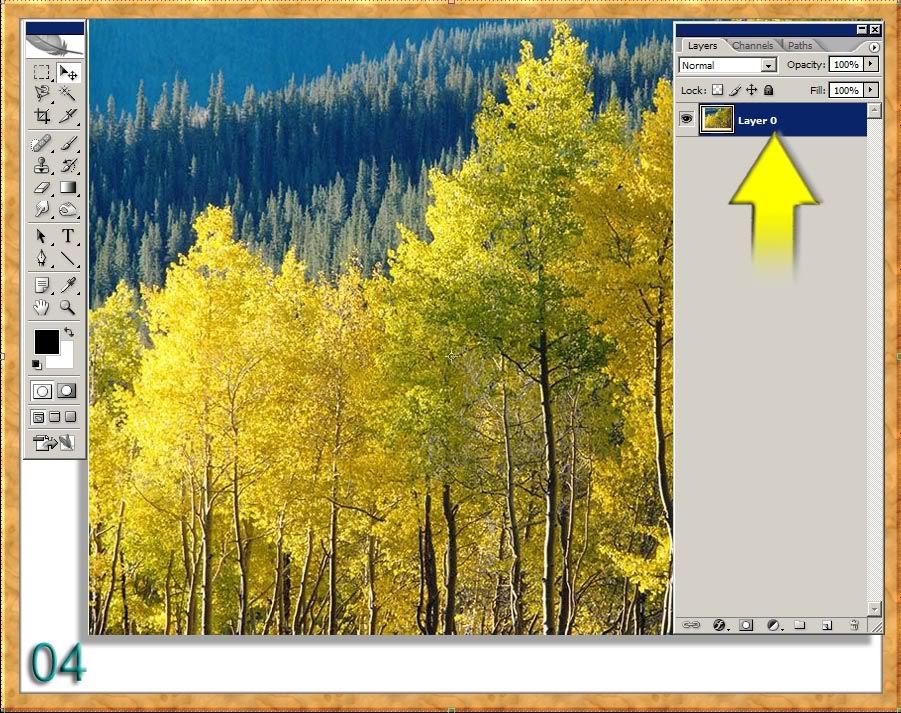
Click OK in the dialogue box and you will see that the Background layer has changed to Layer 0. See images 3 and 4: 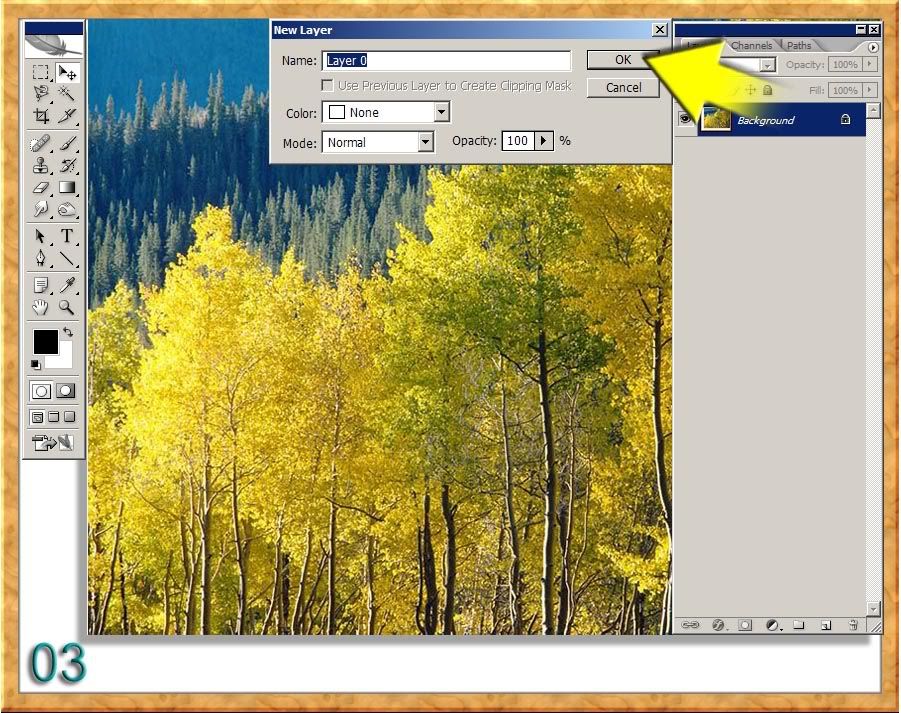
When the Eraser Tool is selected and dragged across the image we see transparent pixels in image 5naturally! 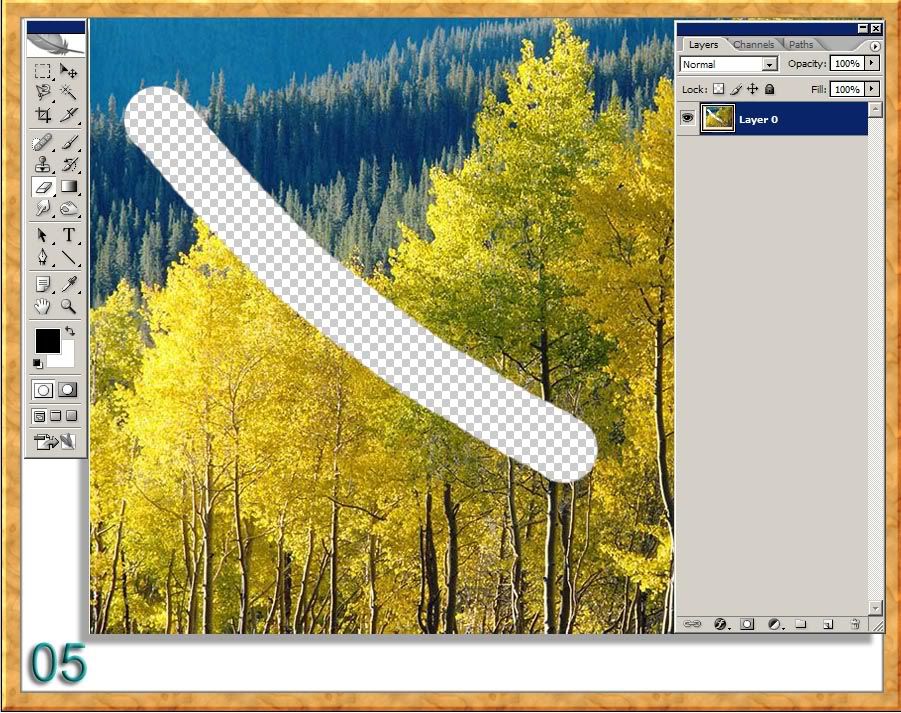
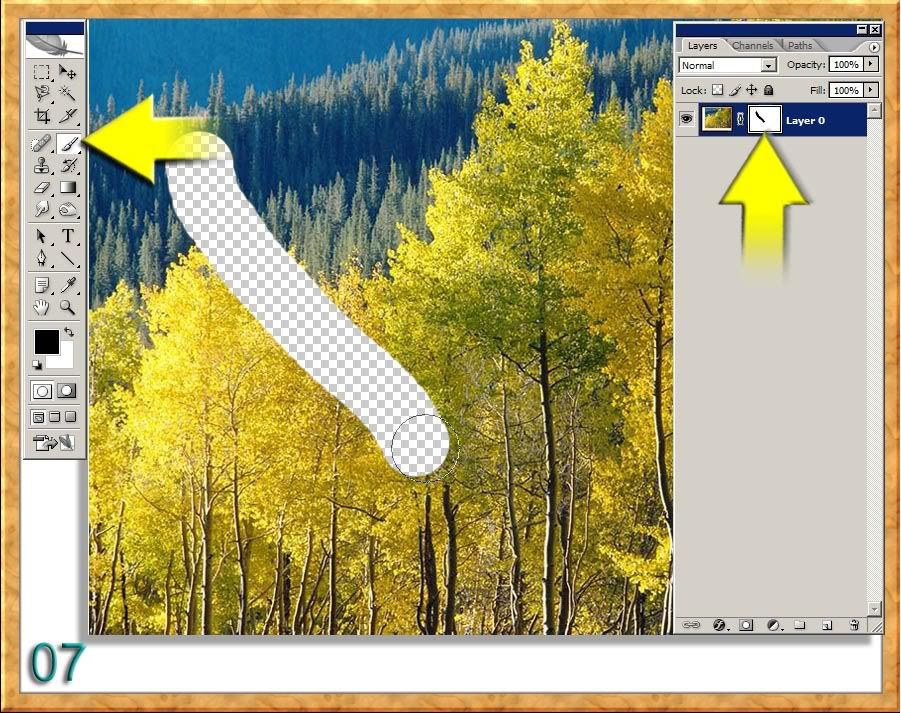
But we get exactly the same effect when the Layer Mask icon at the bottom of the Layers palette is clicked and the Paintbrush tool is selected instead of the Eraser Tool. Note that the default Black is the Foreground Colour: 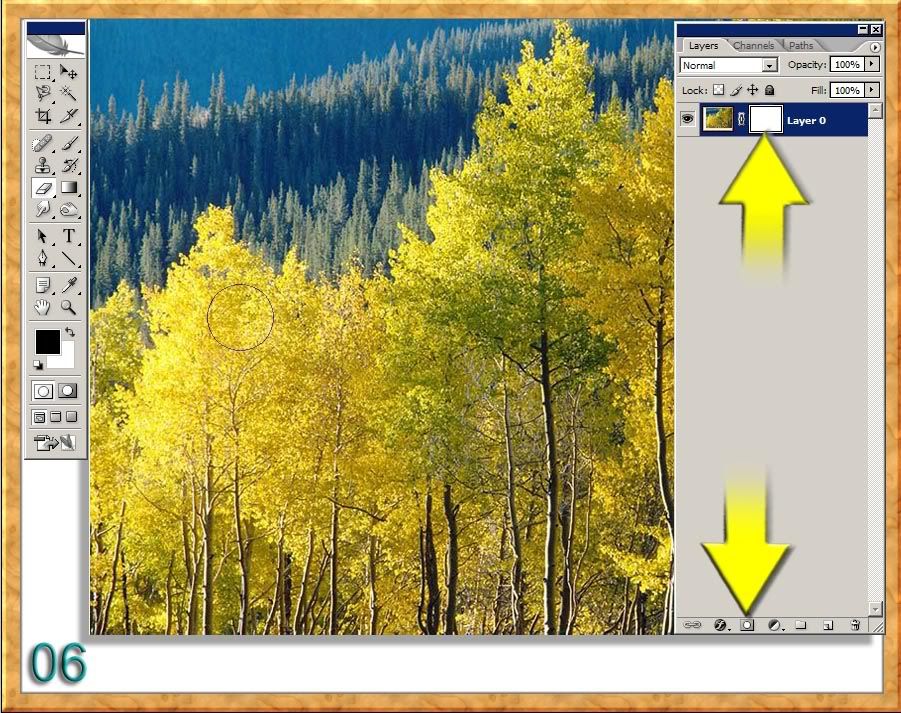
Right-click on the Mask icon, and either from a dialogue box (shown) or a drop-down menu select Delete and click OK. Note: had the Apply button been selected, then that change would have been bindingjust like the Eraser Tool! 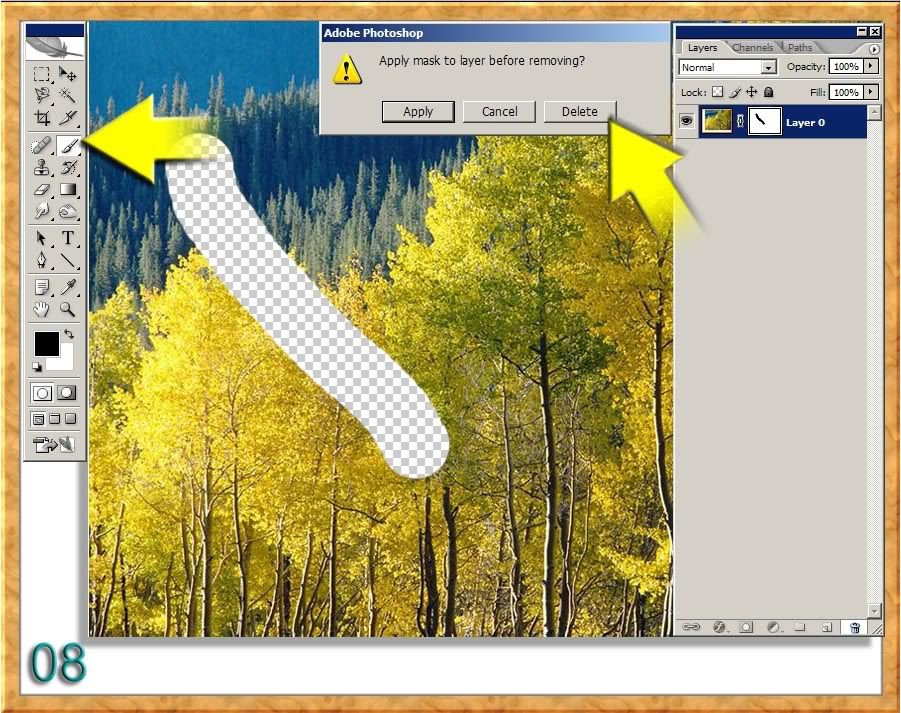
In the next image we again have created a new mask by clicking on the Mask icon in the layers palette, but this time we held the ALT button down before clicking; hence, the Alt-click move which gives us a BLACK mask as can be seen its icon which is just right of the Layer icon: 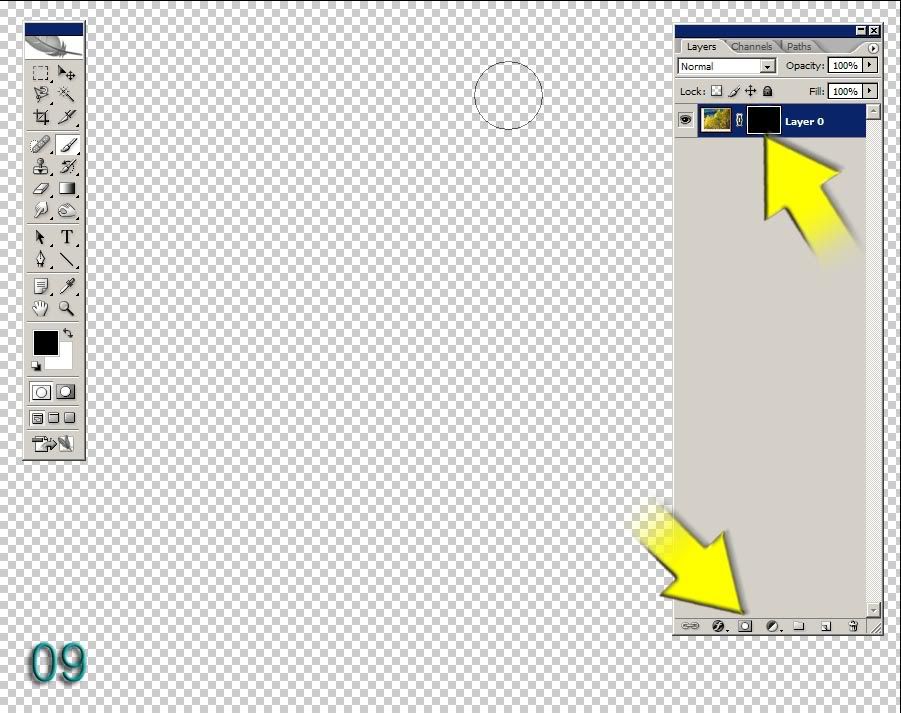
With the Foreground colour set to BLACK (and the Paintbrush Tool still selected) you have a direct equivalent of the Eraser tool; the only difference being is that the Black Mask is functioning as the Eraser Tool on its own protective safety layer. It is in fact a second layer if you like, but without the visual and independent status of a full layer as it is conjoinedas an equalto the normal layer. Now had the Foreground colour been set to White instead then this layer would be invisible and the picture of trees clearly visible, so you could have painted around without having any effect: everything is revealed so there would be nothing to reveal. 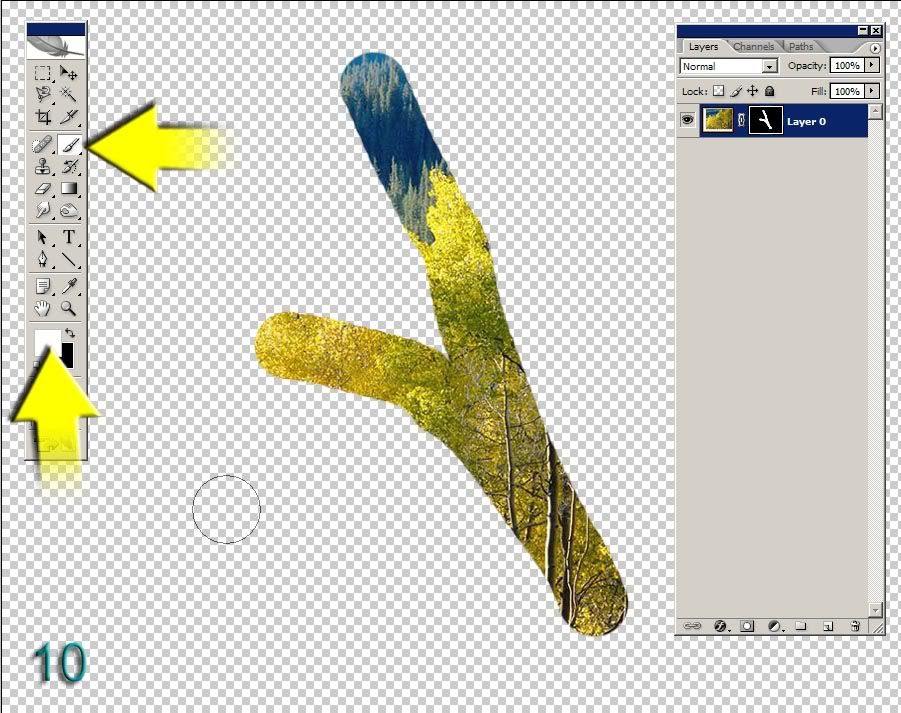
Here with the BLACK Mask still selected, the Foreground colour has now been changed to white, so that by painting on the transparent pixels which were caused by the Eraser equivalentthe BLACK Mask itself or by painting with the Foreground set to BLACKwe have a Reconstruction: an Anti-Eraser if you like. 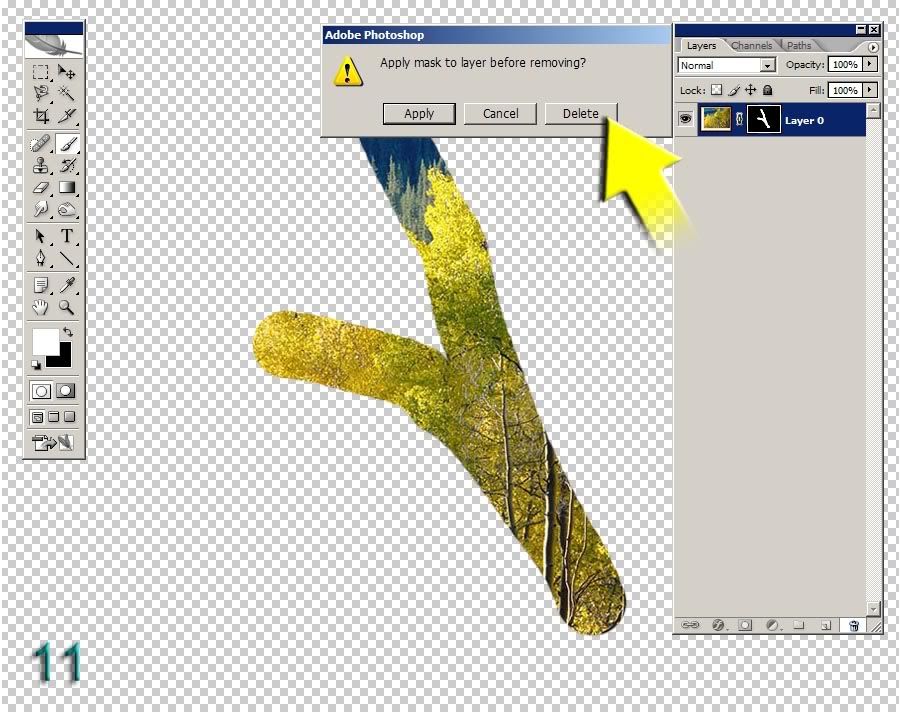
Delete the BLACK Mask as shown (when you drag the Black Mask thumbnail into the trashcan, you should get the Apply mask to layer before removing dialogue box . Next right-click on any blue-part of the Layer (indicating the Layer is active), but not the Layers thumbnail, and select duplicate Layer. A new layer will appear on top of the first layer ( bottom Layer) named Layer 0 copy. Next go to the main menu bar and under Image, Adjustments, Hue/Saturation push the Saturation slider all the way to the left so a black-and-white image of the trees is seen only. 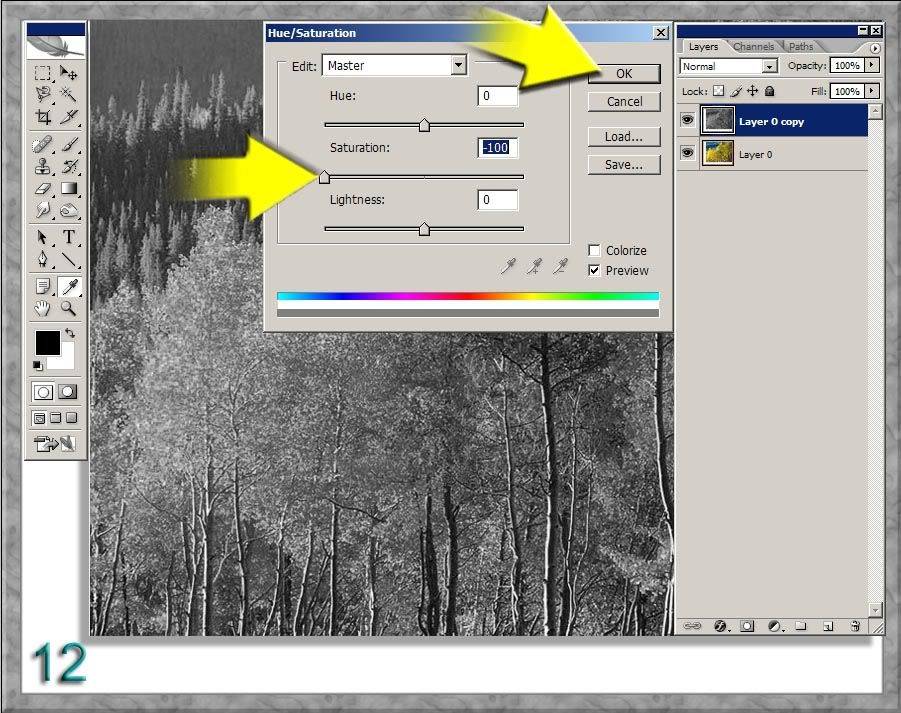
Select the Eraser Tool (top layer active of course) and streak it across the image. Here you can obviously see the bottom Layer showing through. However, an identical result can be obtained by streaking the Paintbrush tool after clicking the Mask icon. But before proceeding to that stage make sure the Undo or go back one step is clicked in order that only a black-and-white image remains. 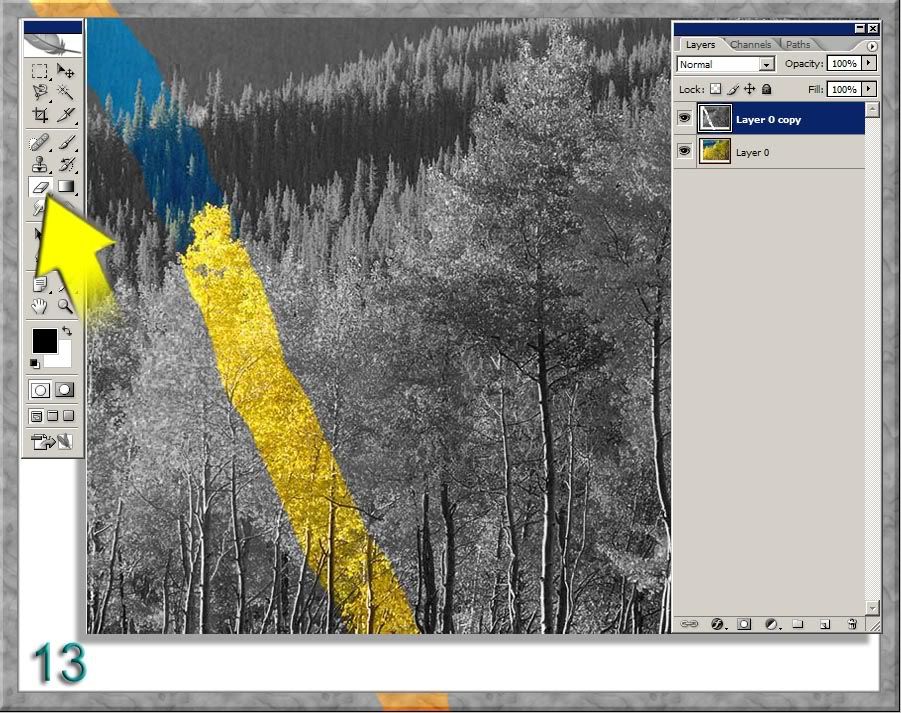
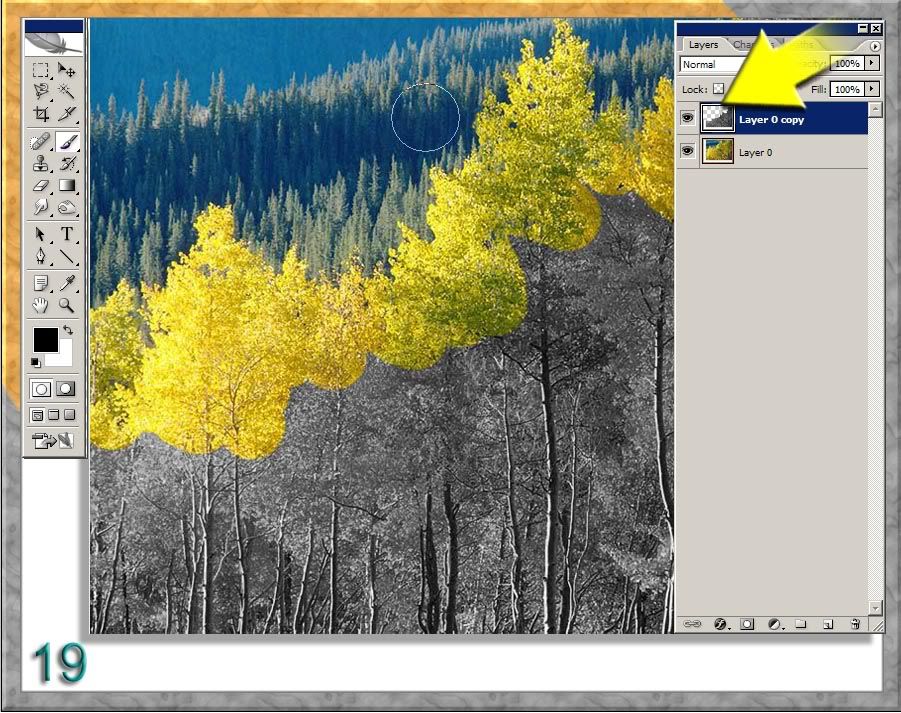
Make sure that you now have the Paintbrush tool and the Foreground Colour set to BLACK (as indicated by the arrows), click on the Mask icon at the bottom of the Layers Palette, and again streak across the image to see a similar effect to that of the Eraser Tool: 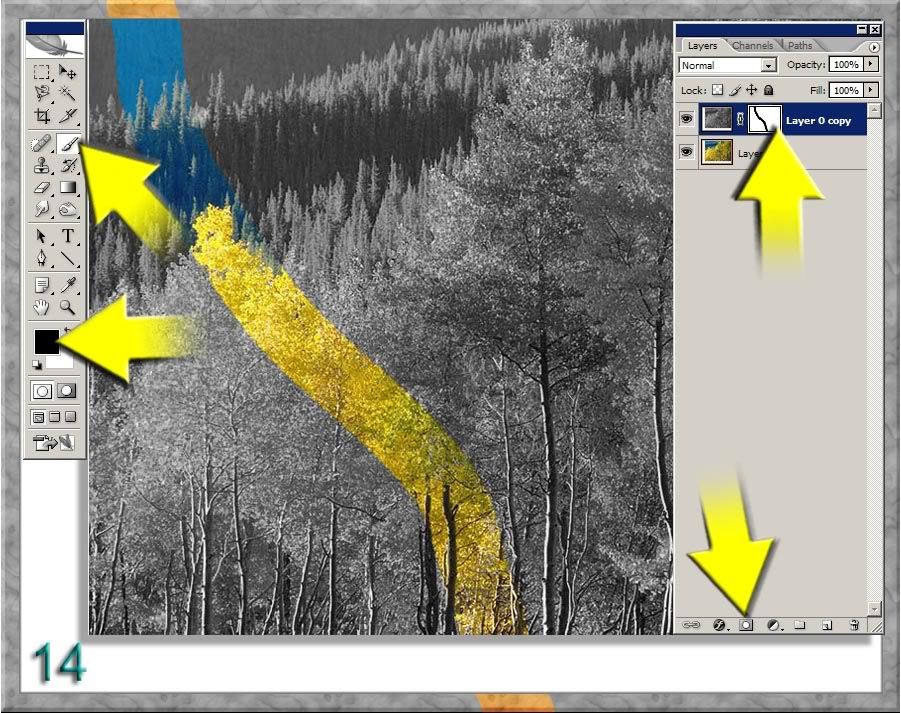
Deselect Layer 0 from view by clicking on the Eye icon to show yet again we have the Paintbrush Tool functioning as the Eraser Tool. Note: do not confuse painting in BLACK Foreground Colour with a BLACK Mask: each is quite separate and distinct from the other; for example, if the Mask Icon is clicked, the default WHITE Mask is created, and, therefore, to see any effect, the BLACK Foreground Colour is chosen. If on the other hand you ALT-Click, then you would have a BLACK Mask, and you would have to click the WHITE Foreground Colour to see an effect. 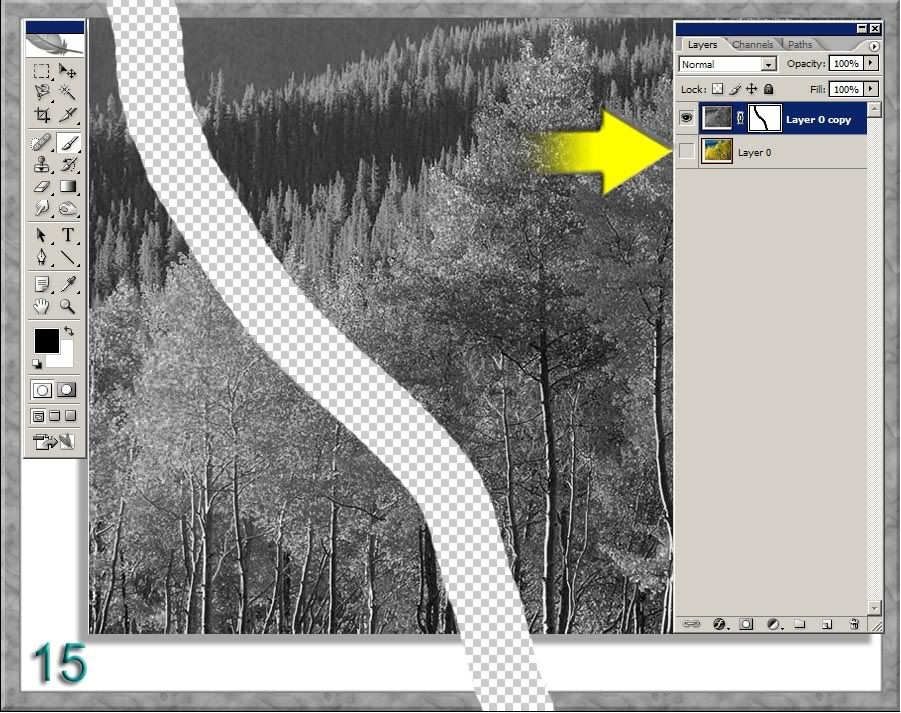
In the next image (16) we can understand the role or functionality of painting when the foreground colour is set to white: it appears to be erasing the erased streaks, but it is important to note that: 1. you cant ERASE something that already been erased; in other words; once the transparent pixels are seen, then only reconstructing them ( putting back what originally erased). To do that one must always have the Paintbrush Tool set WHITE Foreground colour. 2. Whether in WHITE Mask or BLACK Mask mode When the Paintbrush tool is set to WHITE Foreground Colour, you cannot erase the pixels: WHITE will reveal and of course BLACK will conceal by erasing. 3. However, keep in mind the following point: all this concealing (erasing), and revealing ( reconstructing) is happening on an Adjustment Layerthe Layer Mask, and not on the normal or regular Layer that we see. 4. Also keep in mind that the Adjustment Layerthe Layer Mask conjoined to the Layer its affecting will only affect that layer; moreover, the change is only permanent when you click APPLY from the dialog box, otherwise, click delete or click on the Mask thumbnail and drag it to the Trashcan to effect no changes. 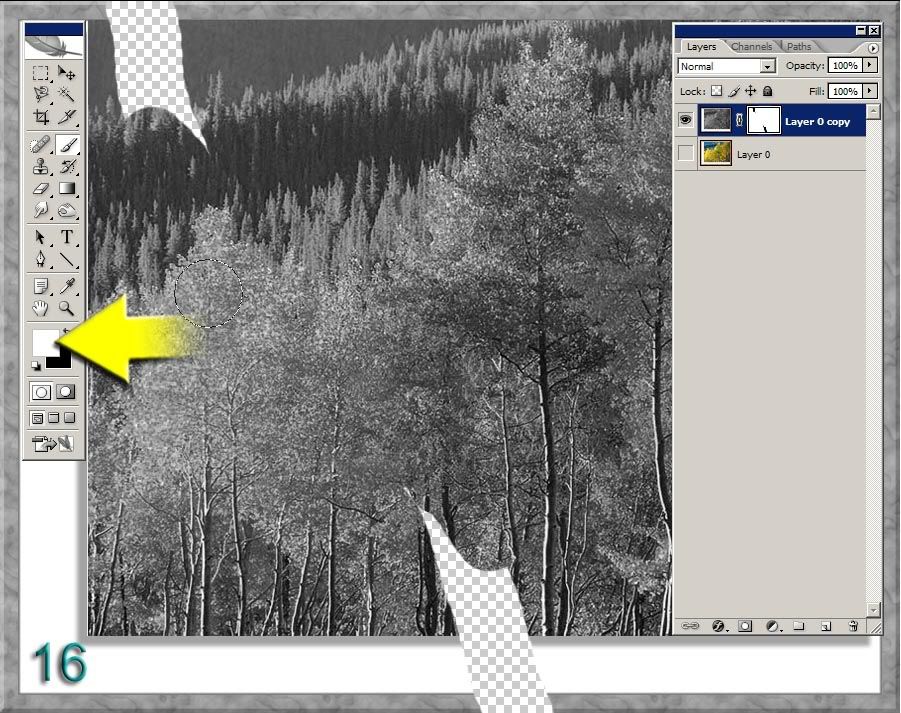
Next set the Foreground Colour to BLACK, andwhile making sure the top Layer remains active (blue) click on the visibility icon (immediately to the left of the thumbnail Layer 0 ), and paint, or should I say erase half the trees as shown: 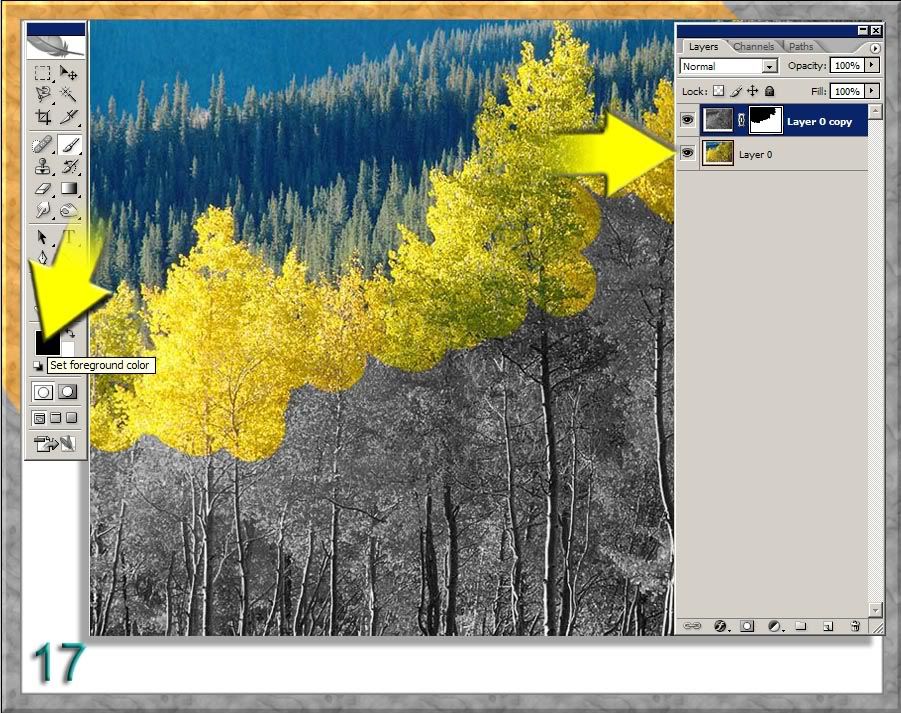
Bring up the dialog box as shown before, and this time click on Apply: 
Finally, when the visibility icon is removed from Layer 0, further proof that the Paintbrush is functioning just like the Eraser: 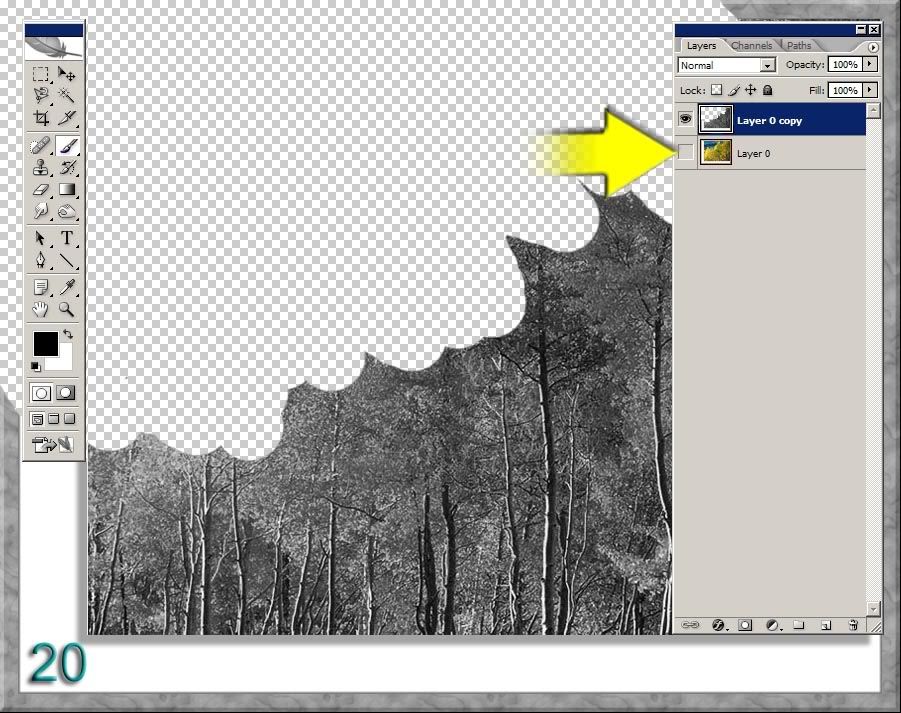
PART TWO: THE MASK TOOL IN ACTION In this section we will see how useful it is using a Safety Eraser whereby its possible to do all the things that the default regular Eraser can do, but without directly removing the pixels of the underlying Layer, thus ensuring that if you were to do too many moves and needed to reverse those moves and were to run-out of undo moves, then the changes made (in the Layer Mask) can be easily reversed by clicking on the Layers Mask thumbnail and dragging it to the Trashcan. The next image is of a hand against a black background whereby the background Layer has been duplicated by clicking on the Layer and dragging it to the New Layer icon as shown here. Next a selection tool (Magic Wand in this instance) has been used and the Backspace key pressed to delete the background pixels leaving a transparent background (as shown in image 22 ): 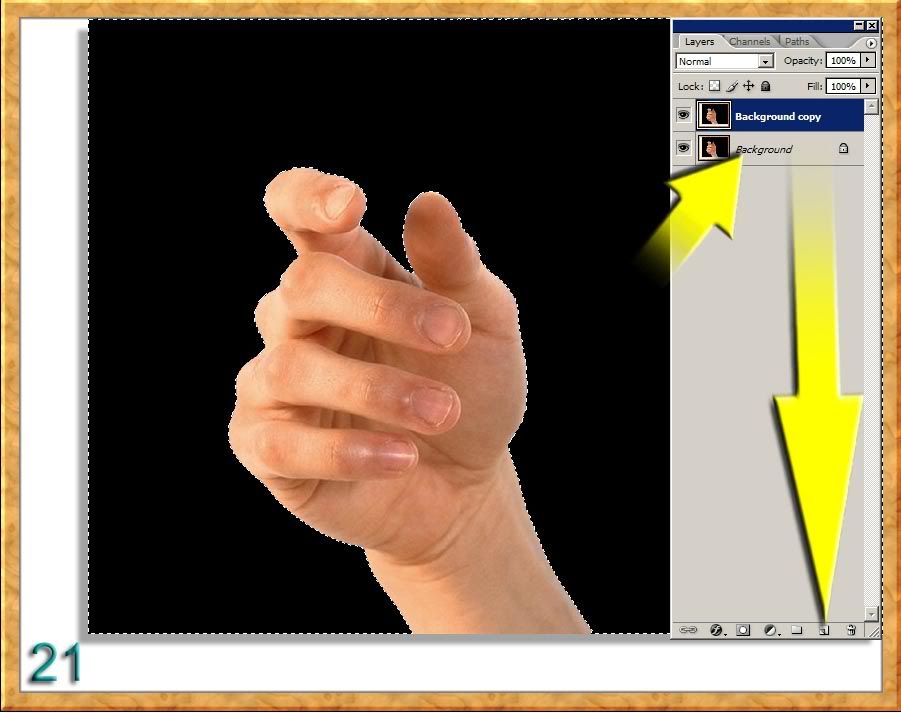
In image 22 another selection has been made (active top Layer), and the visibility icon clicked on the background Layer to hide it from view whichin turnreveals the background transparency in the other two Layers. 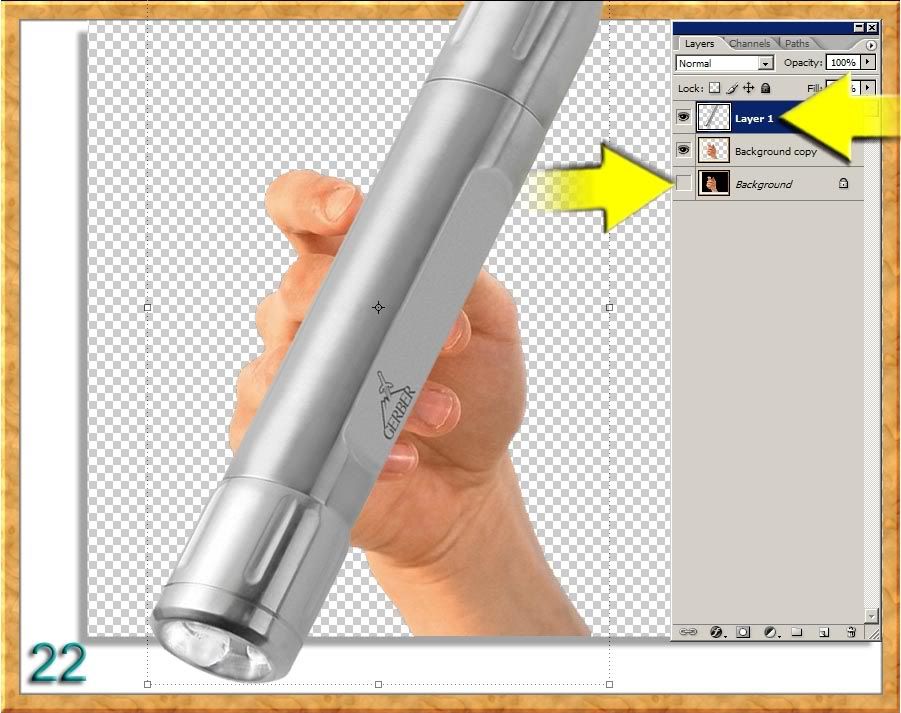
Reduce the top Layers opacity by half (50%). As you can see it is now possible to paint ( erase ) in, on, or over the fingers where the torch overlaps them. 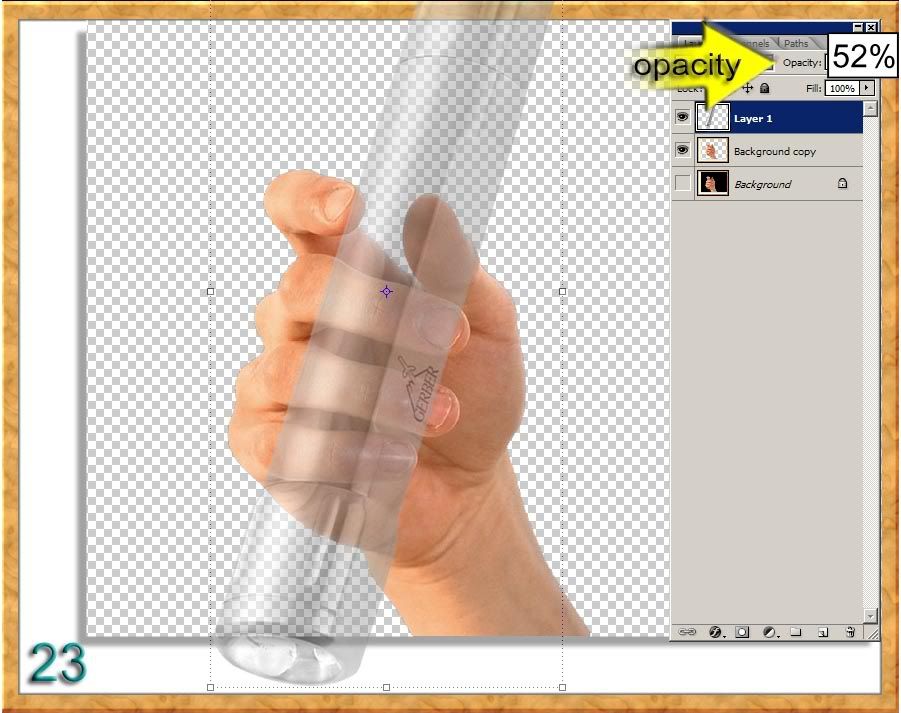
Now click on the Create Mask icon at the bottom of the Layers Palette, and you will then see the new Mask to the right of the active top layer. 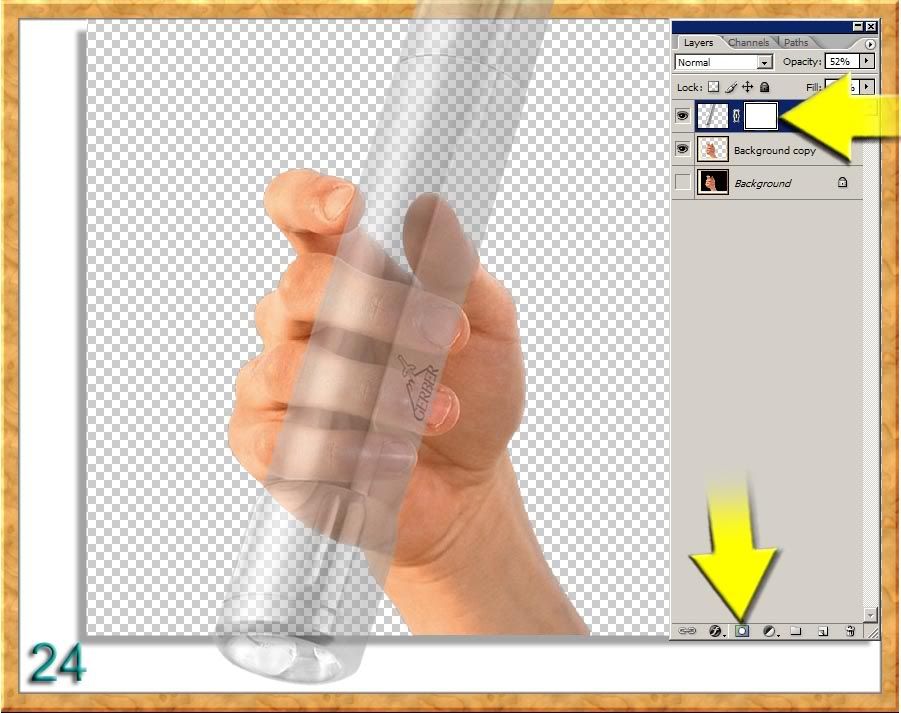
Set the Foreground Colour to BLACK and paint in, on, or over the fingers where the torch overlaps: 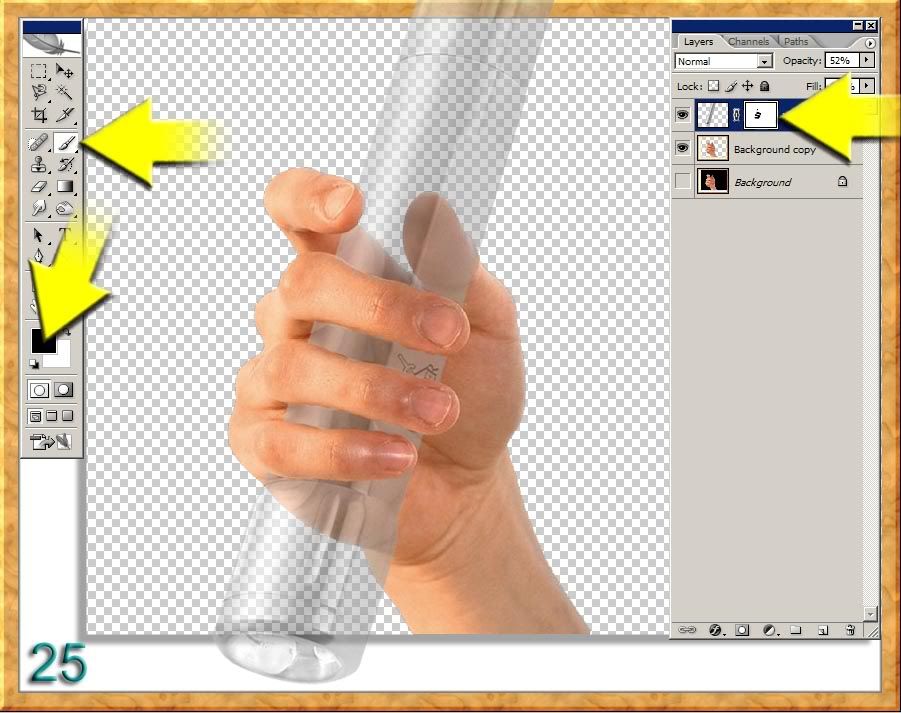
Once that is done, set the Opacity back to 100%: 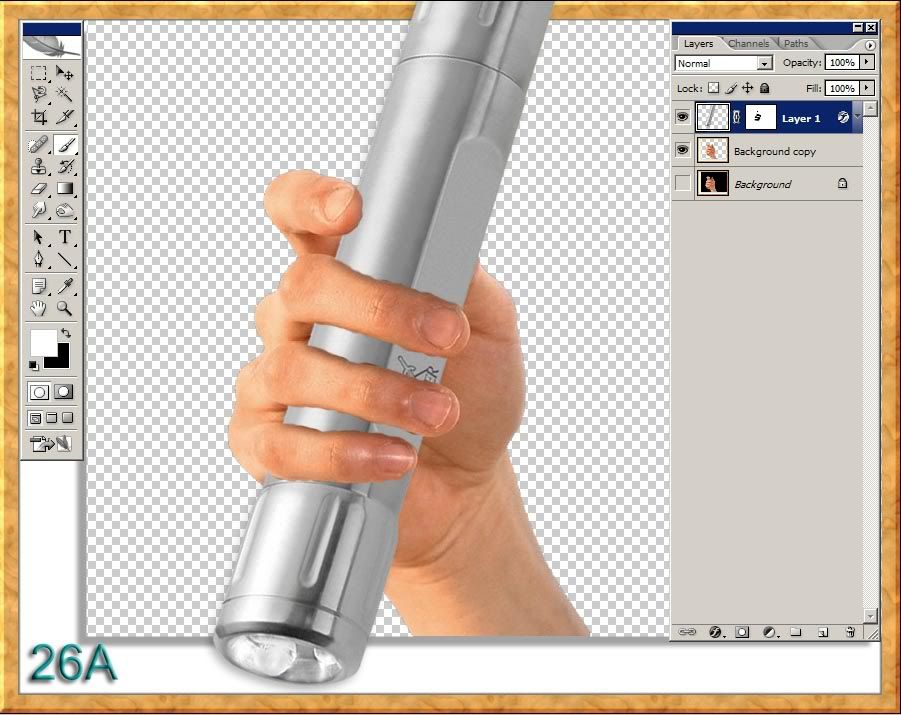
In normal circumstances you will probably never have need to see the Adjustment Mask; however, it is possible to view fully on screen by placing the cursor on the Layers Mask thumbnail ( white thumbnail) and Alt-clicking on it. Alt-click again to reverse the process. 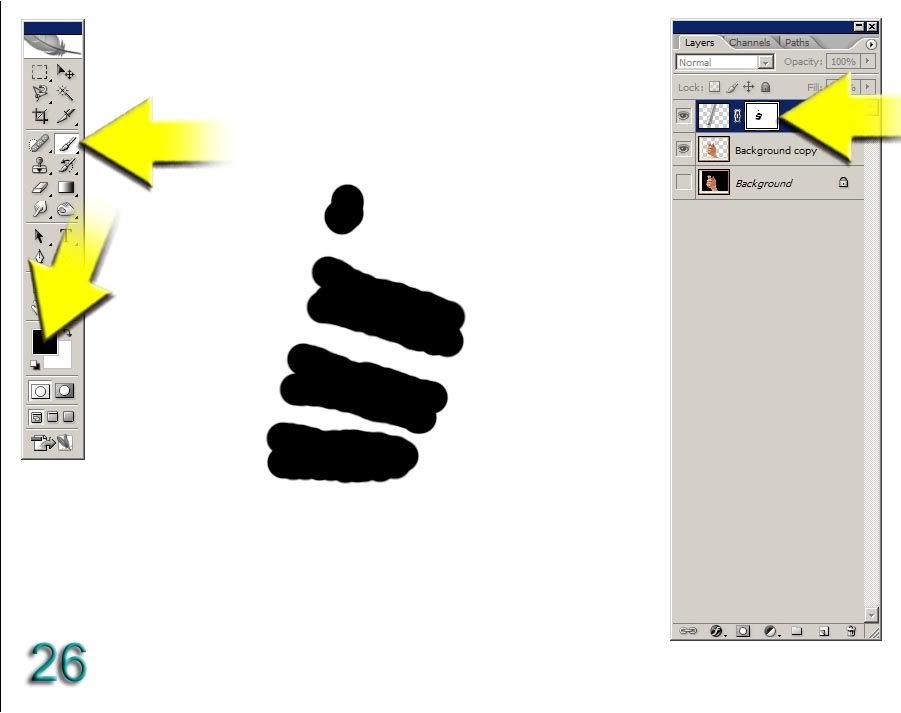
Once you have reversed the process (you should be viewing the regular Layer again), then just left-click on its thumbnail (the thumbnail on the immediate left of the white Mask thumbnail), and you will notice that the white frame over the white Mask has transferred to the Regular Layer. This means that in spite of still having the white Masks icon showing, it is temporarily no longer active, and that all the Adjustments are now fully functional whereas they were greyed-out when the Mask mode was active. Nowat lasttruly painting in black, white, or any other colour is now possible as shown in image 27. 
Tutorial by Michael Sinclair |
Posted on 08/02/07 6:18:07 PM |
|
vibeke
Kreative Kiwi Posts: 2152 Reply |
Re: Masks: the Monster un-Masked
Thnaks Michael, I have printed it to a PDF and will have a close look at it.  |