
| » Forum Index » Reader's Tutorials » Topic: Perspective: How to create chessboard flooring from scratch |
|
Posted on 08/03/18 10:44:58 AM |
|
Mariner
Renaissance Mariner Posts: 2817 Reply |
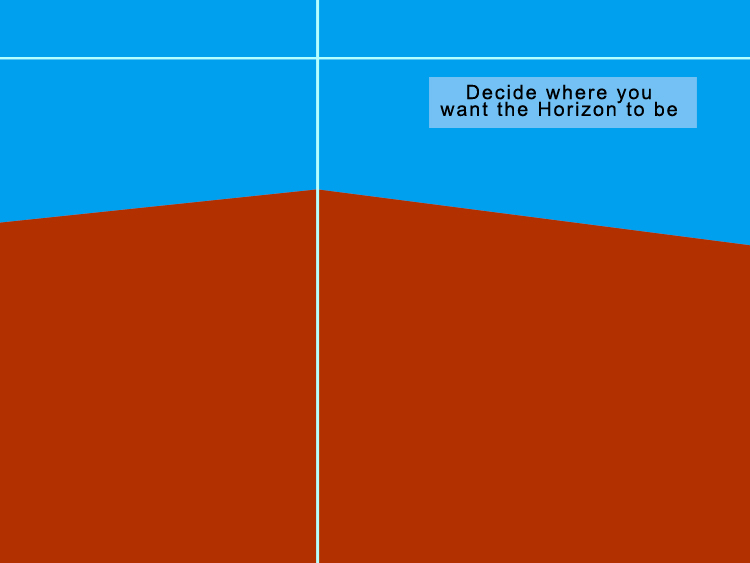
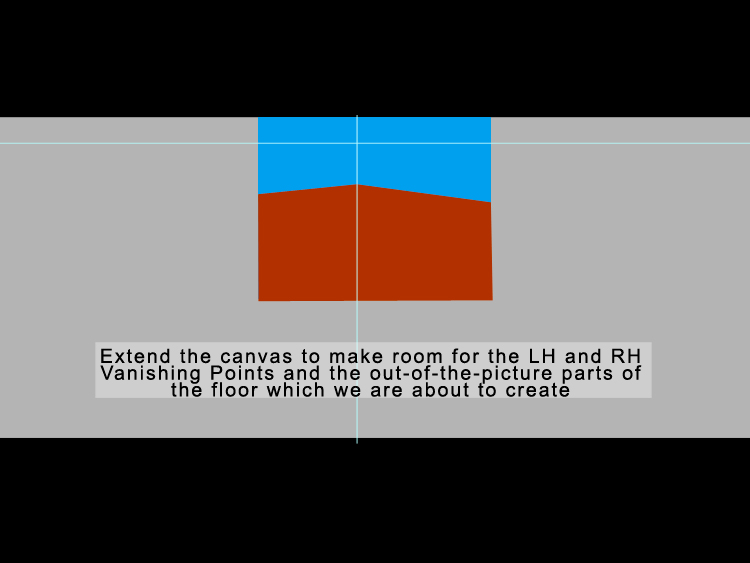
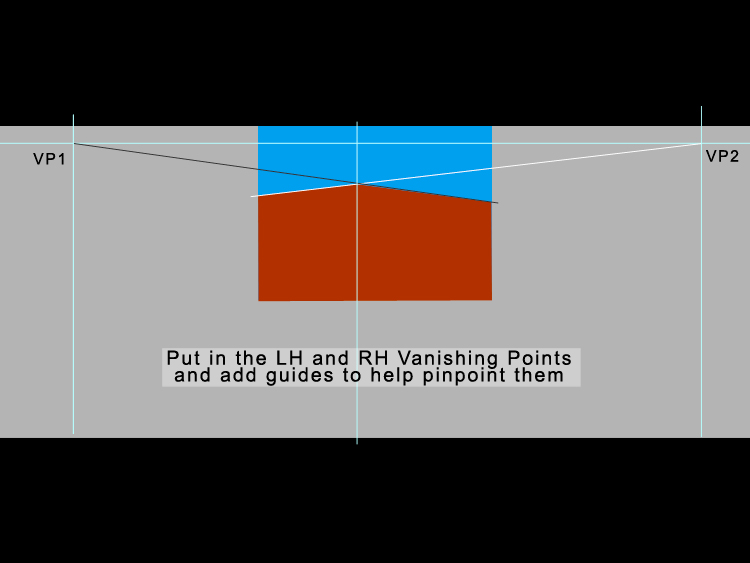
Perspective: How to create chessboard flooring from scratch


|
Posted on 08/03/18 5:23:22 PM |
|
Steve Caplin
Administrator Posts: 6835 Reply |
Re: Perspective: How to create chessboard flooring from scratch
That's a very interesting tutorial! But wouldn't it be a lot easier just to draw a straight chessboard, and use Free Transform to change it to the perspective you want? |
Posted on 08/03/18 5:26:19 PM |
|
DavidMac
Director of Photoshop Posts: 4936 Reply  |
Re: Perspective: How to create chessboard flooring from scratch
Very clever ..... and very pure. I think I might be tempted to approach it in a different rather more crass way. Create the chequerboard as a flat orthogonal shape. Start by creating one black and one white (or whatever) square and make the first row by 'Alt' dragging duplicates and snapping them together. Make it one square longer than needed for final chequerboard. Duplicate and offset by one square for second row and delete the surplus square from each end of each row. Now just duplicate these two rows over and over 'Alt' dragging them to lie beside one another, using snapping, until you have the desired shape. Once finished combine everything into a single orthogonal chequerboard layer. (This sounds complicated but it's actually incredibly quick and easy once the first row is built.) Perform your set up exactly as in your example above up to end of step six. Now using free transformation with the Cmd key held down just drag the four corners of the chequerboard to snap onto the four corners of the red floor shape. What I love about these things is that there are so many different ways of arriving at the same destination. Yours uses true geometry throughout - mine uses distortion once the start geometry is setup. We combine the eggs differently ...... but both end up with a omelette! 
(Note Alt and Cmd are as per Mac. I don't know the windows equivalent.) _________________ The subtlety and conviction of any Photoshop effect is invariably inversely proportional to the number of knobs on it ....... |
Posted on 08/03/18 5:27:31 PM |
|
DavidMac
Director of Photoshop Posts: 4936 Reply |
Re: Perspective: How to create chessboard flooring from scratch
LOL. 
Steve beat me to it while I was typing my answer. _________________ The subtlety and conviction of any Photoshop effect is invariably inversely proportional to the number of knobs on it ....... |
Posted on 08/03/18 5:29:48 PM |
|
DavidMac
Director of Photoshop Posts: 4936 Reply |
Re: Perspective: How to create chessboard flooring from scratch
Serves me right for being so bloody long winded .......... _________________ The subtlety and conviction of any Photoshop effect is invariably inversely proportional to the number of knobs on it ....... |
Posted on 09/03/18 04:59:17 AM |
|
Mariner
Renaissance Mariner Posts: 2817 Reply |
Re: Perspective: How to create chessboard flooring from scratch
Easier, maybe. But you still have to create the extra corners so you know where to fit a straight chessboard accurately. While you are creating your chessboard I will be busy drawing mine so it's probably about the same in the end, except mine is sure to be spot on. |
Posted on 09/03/18 05:19:45 AM |
|
Mariner
Renaissance Mariner Posts: 2817 Reply |
Re: Perspective: How to create chessboard flooring from scratch
Thank you David. In Mac/Windows Cmd = Ctrl, Alt = Alt. Yes, it's easy enough to create a straight chessboard, and both your suggestion and Steve's are probably best and quickest for most people. However, after doing that crazy Chirality challenge last week I had some time to play with and decided to put a tutorial together which gave some insight into how this perspective thing works. Je ne regrette rien! |