
| » Forum Index » Problems and solutions » Topic: clone alernative in this case? |
|
Posted on 29/03/08 12:22:25 PM |
|
jenn62
** Posts: 73 Reply |
clone alernative in this case?
I have a square image that needs to be wider so I changed the canvas size to the size needed. So on either side of the square there is about 2 inches of blank canvas that needs to be filled. And I want to fill it with an exact color contained in the image . I know cloning can be used but I found it hard to make it all smooth - turns out blotchy with such a large area to do. Of course, I could take more time and care to do a smoother job but I was wondering if there is an easier way to just fill up the sides with the color needed. I did try picking the canvas background color with the eyedropper but it doesn't do an exact match and you can see the borders. |
Posted on 29/03/08 12:24:22 PM |
|
tooquilos
Wizard of Oz Posts: 2989 Reply |
Re: clone alernative in this case?
Jenn, can you post the image? |
Posted on 29/03/08 1:19:11 PM |
|
jenn62
** Posts: 73 Reply |
Re: clone alernative in this case?
Hi, the actual image is much too large but here is an example where I used the fill bucket on either side, using the eye dropper to select the color but as you can see there are distinct borders on either side since the actual image color is not even. The clone seems best but it is hard to make it look natural and blended with the rest of the image. I don't know if it's just a matter of practicing with the clone tool or if there is something better that I don't know. 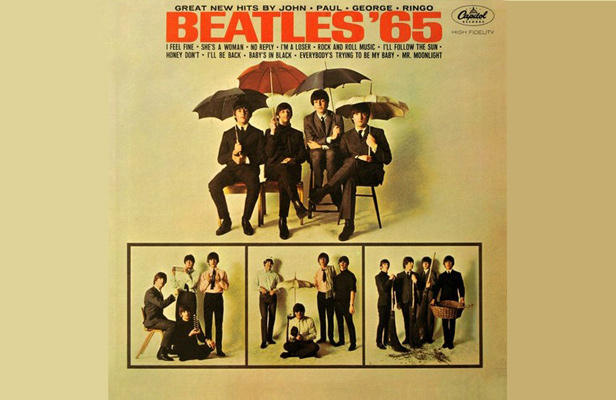 |
Posted on 29/03/08 1:38:40 PM |
|
tooquilos
Wizard of Oz Posts: 2989 Reply |
Re: clone alernative in this case?
Jenn, this is a very quick solution..you could probably spend quite a bit more time on it but to give you an idea of what i did... 1..Selected 2 random colours from the background and created background and foreground colours 2..Applied Render>clouds 3..Applied Noise..(just judge for yourself how much you need) 4..Applied a Layer Mask over the original image and blended in the background to the newly created one. Hope this helps Anna  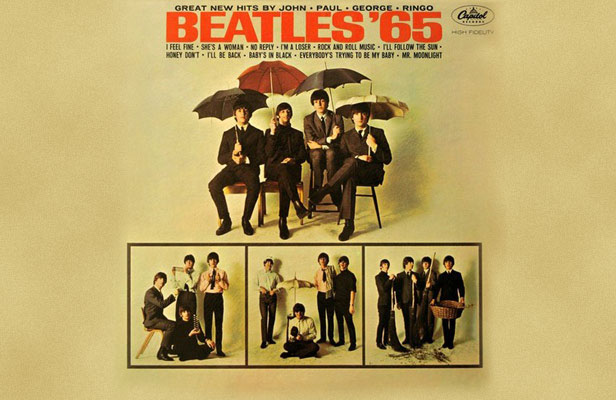 |
Posted on 29/03/08 2:20:50 PM |
|
jenn62
** Posts: 73 Reply |
Re: clone alernative in this case?
Wow great job Anna! Thank you! I want to be able to learn that but I'm stuck already. I'm a newbie in this area. Here's what I did: I assume I first create a new layer so I did that. Then with the new layer selected, I selected the two colors for background and foreground. Then I clicked Render>Clouds and the whole layer got filled and no more image! I checked the original image (background) and it was too all covered with the colors. As you can see in the screenshot, I selected the background layer and it doesn't show the image anymore, shows the same as the new layer. 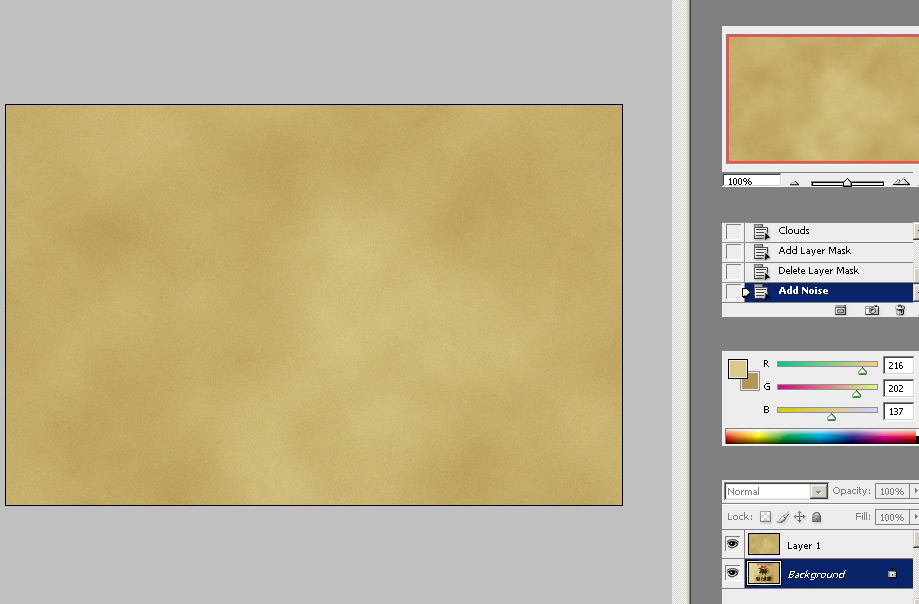 |
Posted on 29/03/08 2:35:23 PM |
|
tooquilos
Wizard of Oz Posts: 2989 Reply |
Re: clone alernative in this case?
Jenn what you need to do is 1..Isolate the Beatles and put them on one layer 2..Underneath that layer, put the clouds(which is on its own layer) 3..The apply the layer mask to the Beatles layer and blend that in I hope this makes sense lol Ive attached a screenshot which hopefully may make sense. Anna 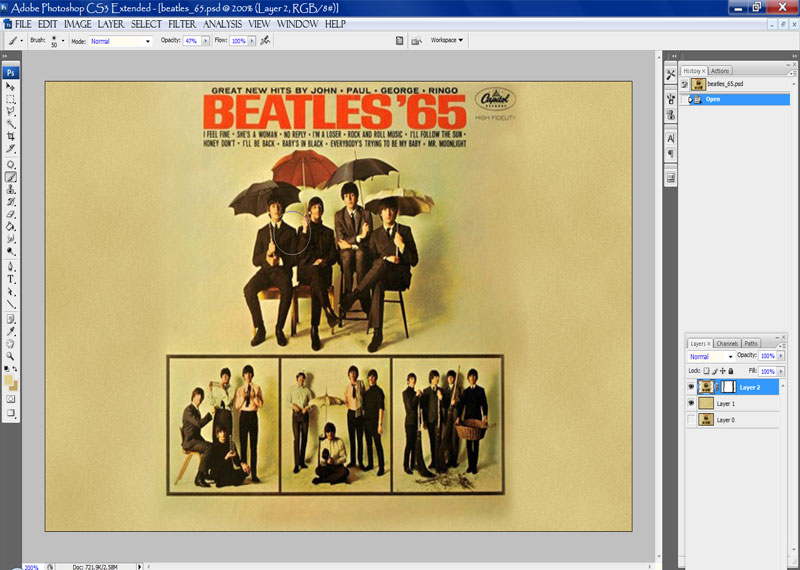 |
Posted on 29/03/08 3:34:13 PM |
|
jenn62
** Posts: 73 Reply |
Re: clone alernative in this case?
Appreciate your time in helping me but I'm such a newbie here and I just don't know what I'm doing wrong. 1. I double clicked to turn the background image into a Layer (Layer 0) as I can see in your screenshot too. 2. I created a NEW LAYER (Layer 1)and applied the clouds/distortion to it. I see in your screenshot it is above Layer 0 same as here. 3. is where I'm stuck. Is this when I need to isolate the image and how do I do that?. What I did is I selected just the square beatle image and clicked Edit>Copy. Then I created a new layer and clicked PASTE. Then I clicked Add Layer Mask but I don't know how to continue after that. Do I select/copy it all and paste in a new layer? And then add a Layer Mask which I know about how to use.  |
Posted on 29/03/08 3:35:42 PM |
|
dave.cox
Marquee Master Posts: 518 Reply  |
Re: clone alernative in this case?
Anna, good job. Another good solution is to use the pattern maker. I will put together instruction for this a little later this afternoon. 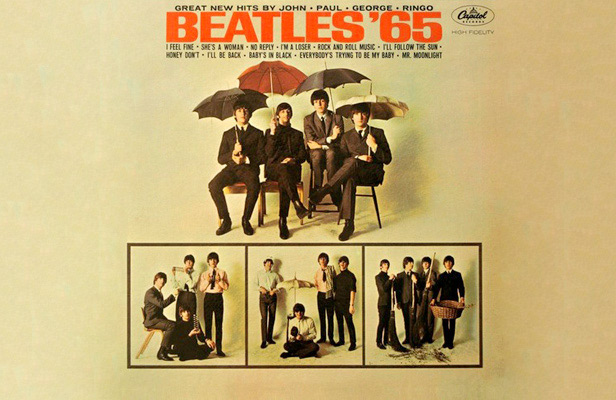 |
Posted on 29/03/08 3:39:35 PM |
|
jenn62
** Posts: 73 Reply |
Re: clone alernative in this case?
Appreciate your time in helping me but I'm such a newbie here and I just don't know what I'm doing wrong. 1. I double clicked to turn the background image into a Layer (Layer 0) as I can see in your screenshot too. 2. I created a NEW LAYER (Layer 1)and applied the clouds/distortion to it. I see in your screenshot it is above Layer 0 same as here. 3. is where I'm stuck. Is this when I need to isolate the image and how do I do that?. What I did is I selected just the square beatle image and clicked Edit>Copy. Then I created a new layer and clicked PASTE. Then I clicked Add Layer Mask (Layer 2) but I don't know how to continue after that. This is what the pallet ended up looking like 
|
Posted on 29/03/08 3:45:07 PM |
|
jenn62
** Posts: 73 Reply |
Re: clone alernative in this case?
oops my post went in twice and I don't see how the first one can be removed. sorry |
Posted on 29/03/08 3:49:09 PM |
|
jenn62
** Posts: 73 Reply |
Re: clone alernative in this case?
Dave, yours looks good too. Thanks. What a great help forum this it, now if I can only figure out how to do either these methods so they become simple to me too. lol |
Posted on 29/03/08 7:08:55 PM |
|
dave.cox
Marquee Master Posts: 518 Reply |
Re: clone alernative in this case?
Thanks Jenn. I'll see if I can show you how to do this, as well as answer your questions now. I like to use the pattern maker for this kind of fill in, as it gives me a background that looks very close to the original, and yet it is fast. To start, select an are in the existing photo that to use as a source for your pattern. Use the Marquee tool to select this area. When you have the are you want selected, press Conrtol C or Cmd C to copy that section. 
Now select filter > Pattern Maker from the Menu. You will see the very large pattern maker dialog appear. 
Since we have made the selection where we want to make our patter from, all we need is the menu at the right. Click to check the box "Use Clipboard as sample", and then click on Generate. 
Your new pattern will be created, and a preview displayed at the bottom of the dialog. At the bottom left, click the little Diskette icon to save your new pattern. 
We are now finished with the pattern maker. Click cancel, to close the dialog. From the tool bar, select the Heal Brush. 
In the Heal Brush Options area, select Source: Pattern, and click on the Pattern pull down. Locate the pattern that you just saved from the pull down, and select it. 
Create a new layer. Change the brush mode to "Replace", and paint the new pattern in, but don't quite touch the existing pattern. Change the brush mode back to "Normal", and paint the pattern in where the new and old patterns join. Also, go back over any area that doesn't look quite right from the first painting in. Use fairly short strokes, and plenty of overlap, but don't work too close areas where there is a sharp pattern change. To answer your other questions about how to get information to show through from one layer to the next, I suggest you go through the chapter "Hiding and Showing" In this section, Steve shows you many techniques for working with layers and layer masks. This information is the key to many effects in Photoshop, including your previous question. |
Posted on 29/03/08 7:56:26 PM |
|
vibeke
Kreative Kiwi Posts: 2209 Reply |
Re: clone alernative in this case?
A quick and easy way, is one I use for our Team photographs, when we run out of curtain. wit the Marque tool make a selection on one side, top to bottom. In this case I had to go into the picture. On the left side to the Start of the 'B' in beatles. Same size on the right. Now clone out the bits you don't want to show, lock transparency. flip the selection horizontally, so the seams match. Now stretch to desired size.  |
Posted on 29/03/08 8:42:39 PM |
|
jenn62
** Posts: 73 Reply |
Re: clone alernative in this case?
That was great Dave! Thanks so much. I am very happy with the results and with knowing this technique. Haven't gotten to that Layer Masks chapter in Steves book yet but I will eventually and I still do want to learn Anna's and Vibekes techniques and I am sure I will eventually be able to do them just as easily as this one. Here's my result, I decided to smooth it out it a bit:  |
Posted on 30/03/08 07:20:55 AM |
|
Nick Curtain
Model Master Posts: 1802 Reply |
Re: clone alernative in this case?
Dave and Anna, these are great tutorials Anna, many thanks for the underwater grad tutorial. superb. Nick |
Posted on 30/03/08 10:34:39 AM |
|
tooquilos
Wizard of Oz Posts: 2989 Reply |
Re: clone alernative in this case?
Thanks Nick ! |