
| » Forum Index » Image doctor » Topic: glow |
|
Posted on 18/10/07 05:55:14 AM |
|
vicho
Ingenious Inca Posts: 248 Reply 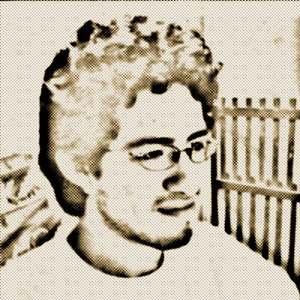 |
glow
hi do you think there is any way ot fix this picture? 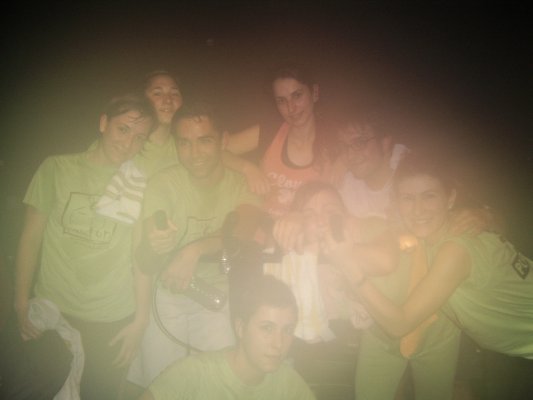 |
Posted on 18/10/07 06:19:04 AM |
|
vicho
Ingenious Inca Posts: 248 Reply |
Re: glow
here´s what i tried, any suggestions? 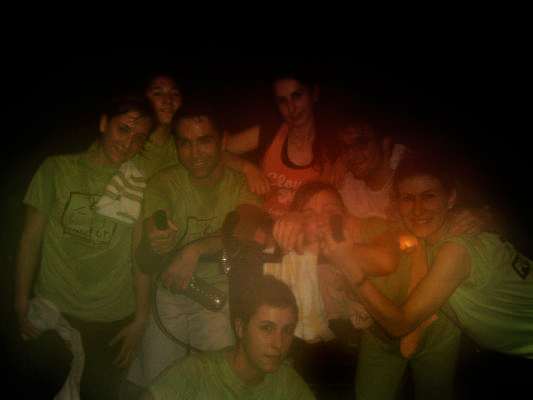 |
Posted on 18/10/07 11:23:25 PM |
|
steve hill
Brain Basher Posts: 228 Reply |
Re: glow
I dont think you will completely remove the glow only reduce and change the colour cast. I did this with a variations adjustment  |
Posted on 19/10/07 09:12:00 AM |
|
Bob
Expert Expressionist Posts: 130 Reply |
Re: glow
You're going to lose something, but you might want to play with local contrast enhancement (unsharp mask: high radius low amount) with some dodge/burn.  |
Posted on 20/10/07 03:58:49 AM |
|
vicho
Ingenious Inca Posts: 248 Reply |
Re: glow
hi steve, how did you get that effect, with hue/saturation?? bob, the onlys filter you applied was th unsharp mask? thanks |
Posted on 20/10/07 04:48:29 AM |
|
Bob
Expert Expressionist Posts: 130 Reply |
Re: glow
Pretty much. The center portion needed a stronger correction than the edges so I used two layers one adjusted for the edges and one adjusted for the center. I used a layer mask on each layer to control which area contributed to the final image. I placed a layer above filled with 50% grey and set to soft light blending mode and painted on it with black and white to dodge/burn where needed to blend and adjust tonal values. |
Posted on 25/10/07 09:50:06 AM |
|
Atomicfog
Virtual Visualizer Posts: 238 Reply |
Re: glow
I tweaked quite a few aspects in several different ways to bring out every detail originally in the image, while also keeping it as natural looking as I could. 
|
Posted on 25/10/07 12:06:13 PM |
|
maiden
Golden Gif Gagster Posts: 471 Reply |
Re: glow

I used a combination of Shadows/Highlights... to improve the Midtone Range and bring some detail back in the highlighted area. I then used Channels to select the Brightest of the channels and make a selection from it (Ctrl/Cmd clicking the Channel's icon) this loads up the brightest areas as a selection which I then clicked on the image's layer in Layers and (Ctrl/Cmd + J) to make a new layer via copy of the images brightest areas which I then used a Levels on to improve that area of the photo. I loaded the selection from the channel a second time, but this time inverted the selection and (Ctrl/Cmd + J) to create a new layer via copy to work on the Levels of the Darkest Areas of the image. ...with some Noise Reduction to partially eliminate the dramatic increase in noise, then other things I did was to create a High Pass... layer of the original image placed over the new image and set the blending to Hard Light to punch up the edge detail. It's by no means perfect but an improvement at least. |
Posted on 28/10/07 06:23:12 AM |
|
vicho
Ingenious Inca Posts: 248 Reply |
Re: glow
atomicfog, that´s a very nice improvement, thanks! |
Posted on 28/10/07 06:25:10 AM |
|
vicho
Ingenious Inca Posts: 248 Reply |
Re: glow
hi, maiden where do i find the High Pass and what does it do exactly? thanks for the reply!! |
Posted on 28/10/07 11:28:33 AM |
|
maiden
Golden Gif Gagster Posts: 471 Reply |
Re: glow
The High Pass Filter can be found under Filter/Other/High Pass.. what it does is to create an edge detail map or at least highlights the edge detail within an image. Make a layer copy of your image above the image and use Filter/Other/High Pass using the slider to whatever value looks best in the preview usually anything between 1 and 4 pixels should be enough. Then this High Pass layer can be set to either Soft Light for a softer sharpening effect or Hard Light for a more defined sharpening. Often this technique is used for sharpening as it doesn't leave so many artifacts and is a non-destructive way of sharpening your original image layer. If there is a lot of colour within your image then after using High Pass you can also chose to Desaturate the High Pass Layer (Ctrl/Cmd + Shift + U) |