| » Forum Index » Image doctor » Topic: how to get rid of the fringe |
|
Posted on 08/03/19 04:23:20 AM |
|
larkspur
* Posts: 7 Reply |
how to get rid of the fringe
Hi guys, I am trying to change the background color in this image. Here's the original photo. 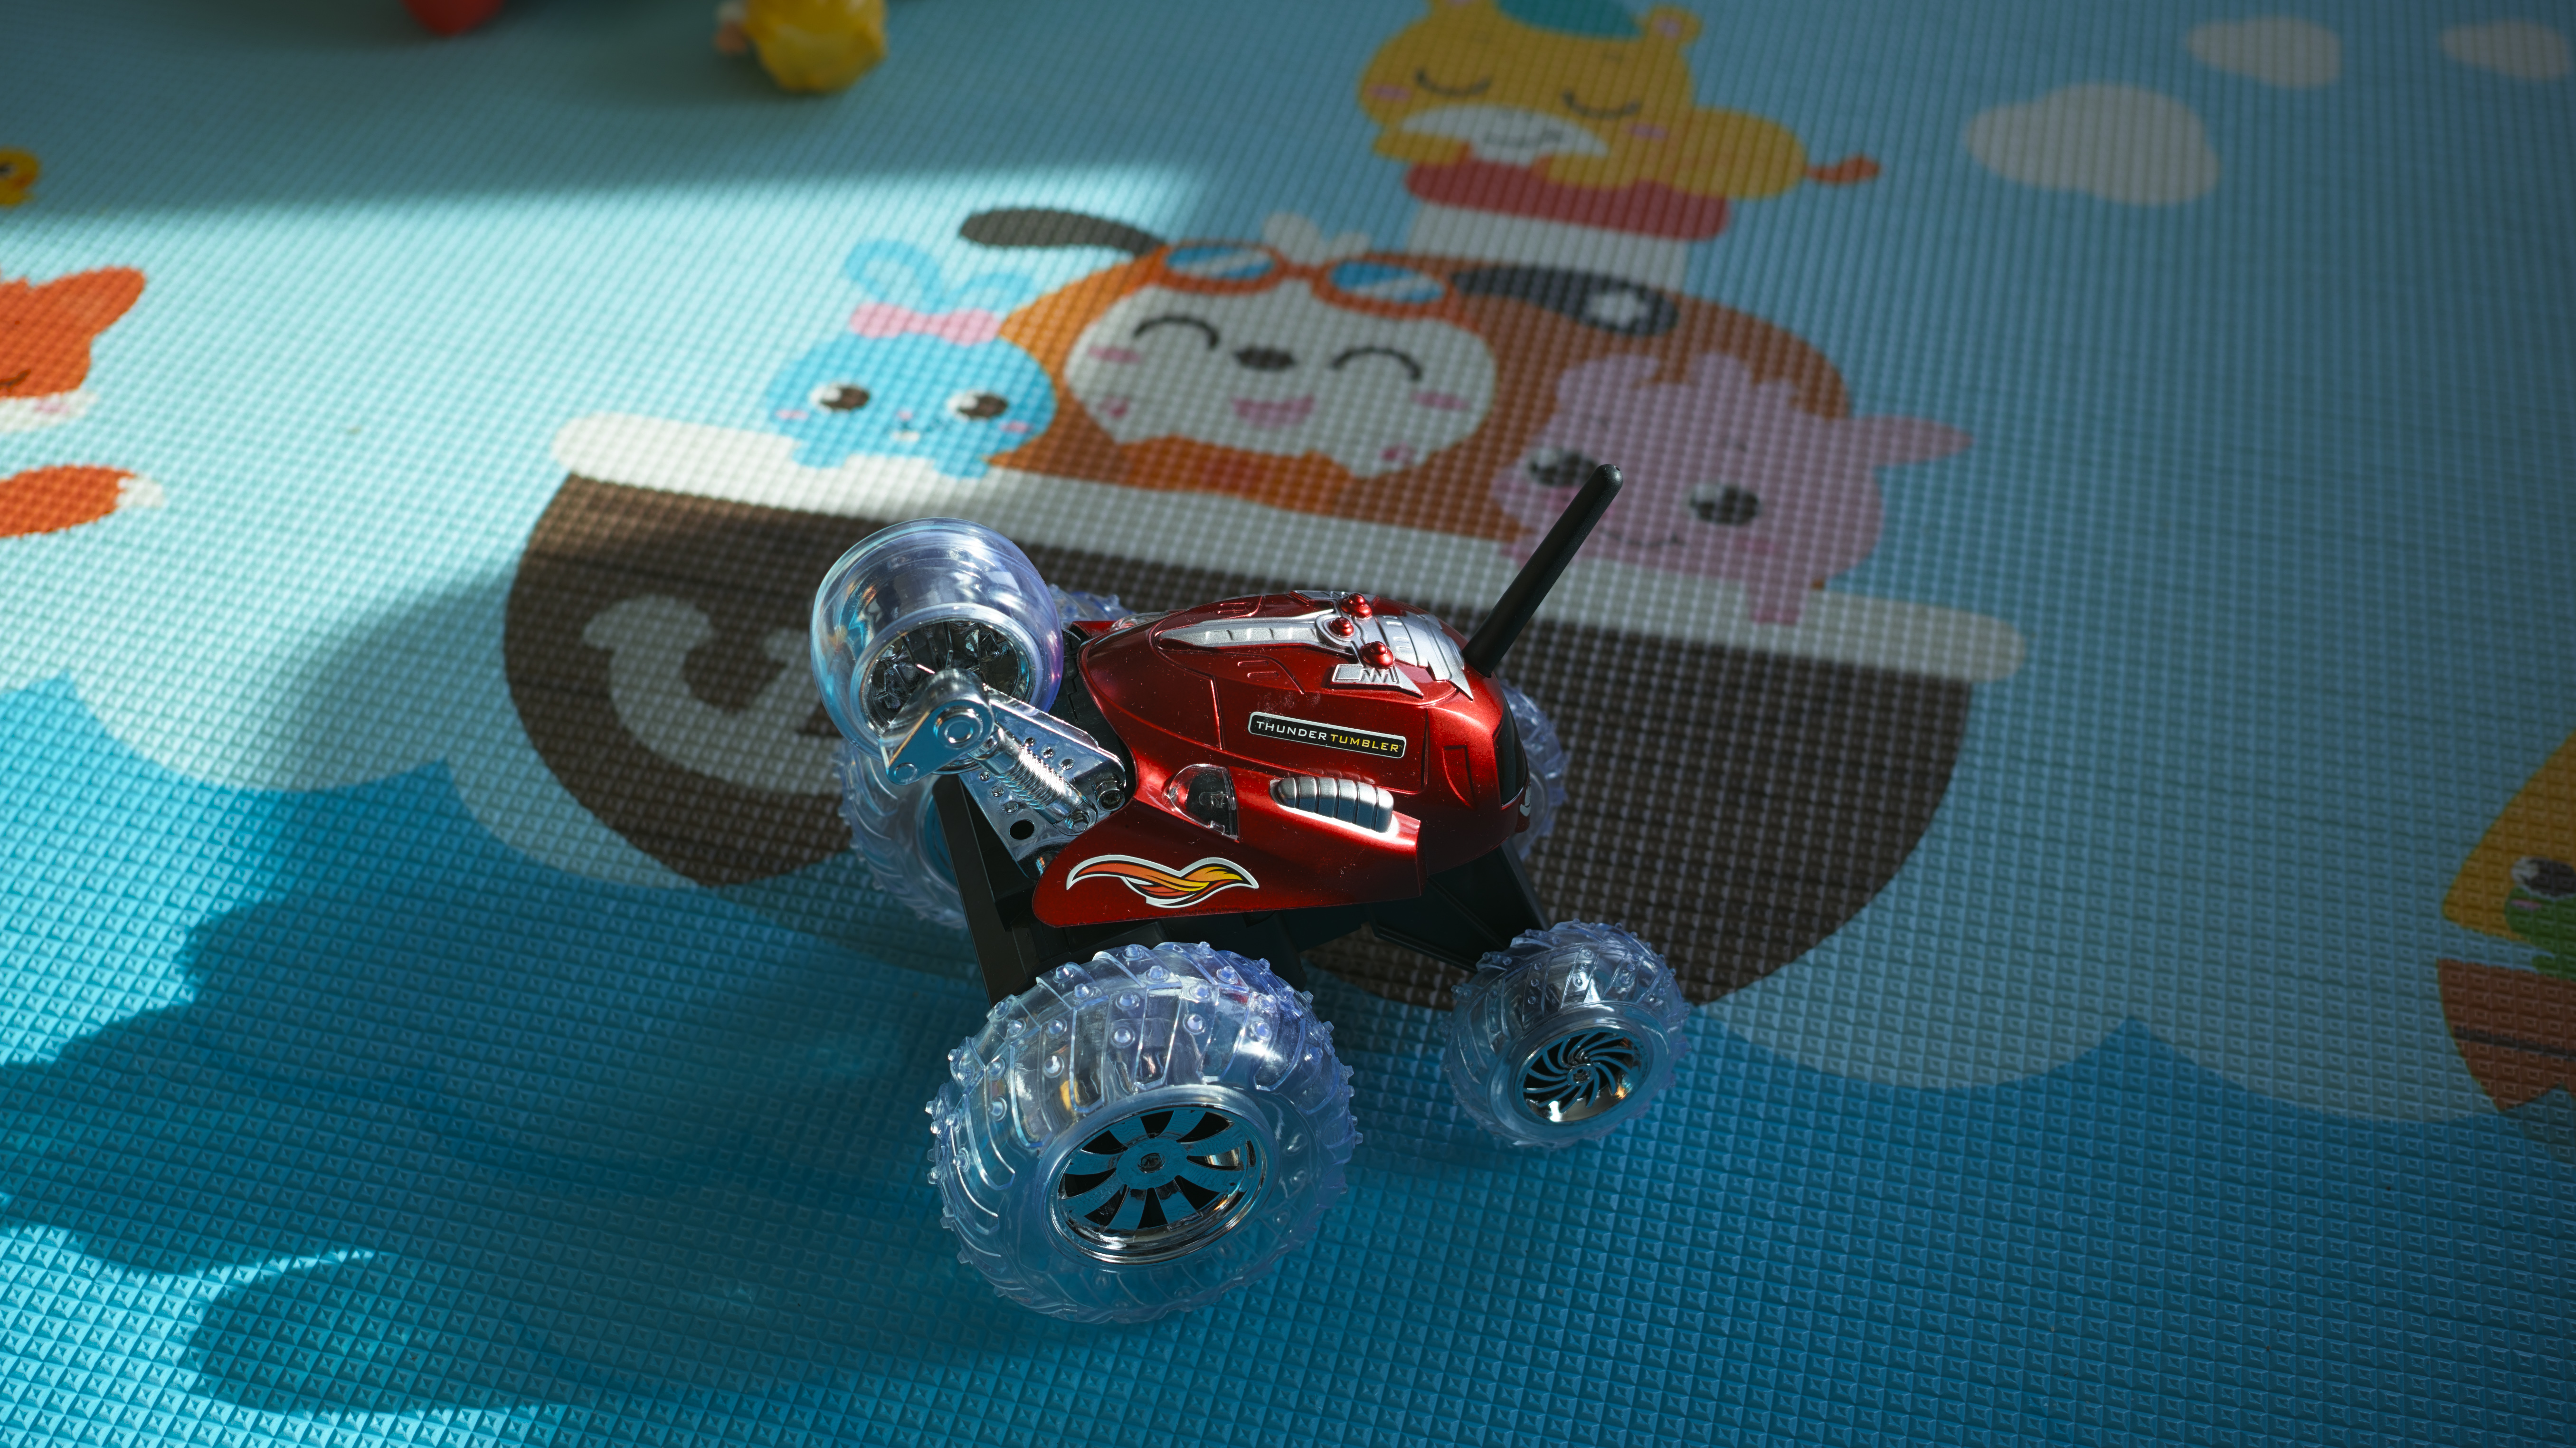
And here's what I got after the adjustments. 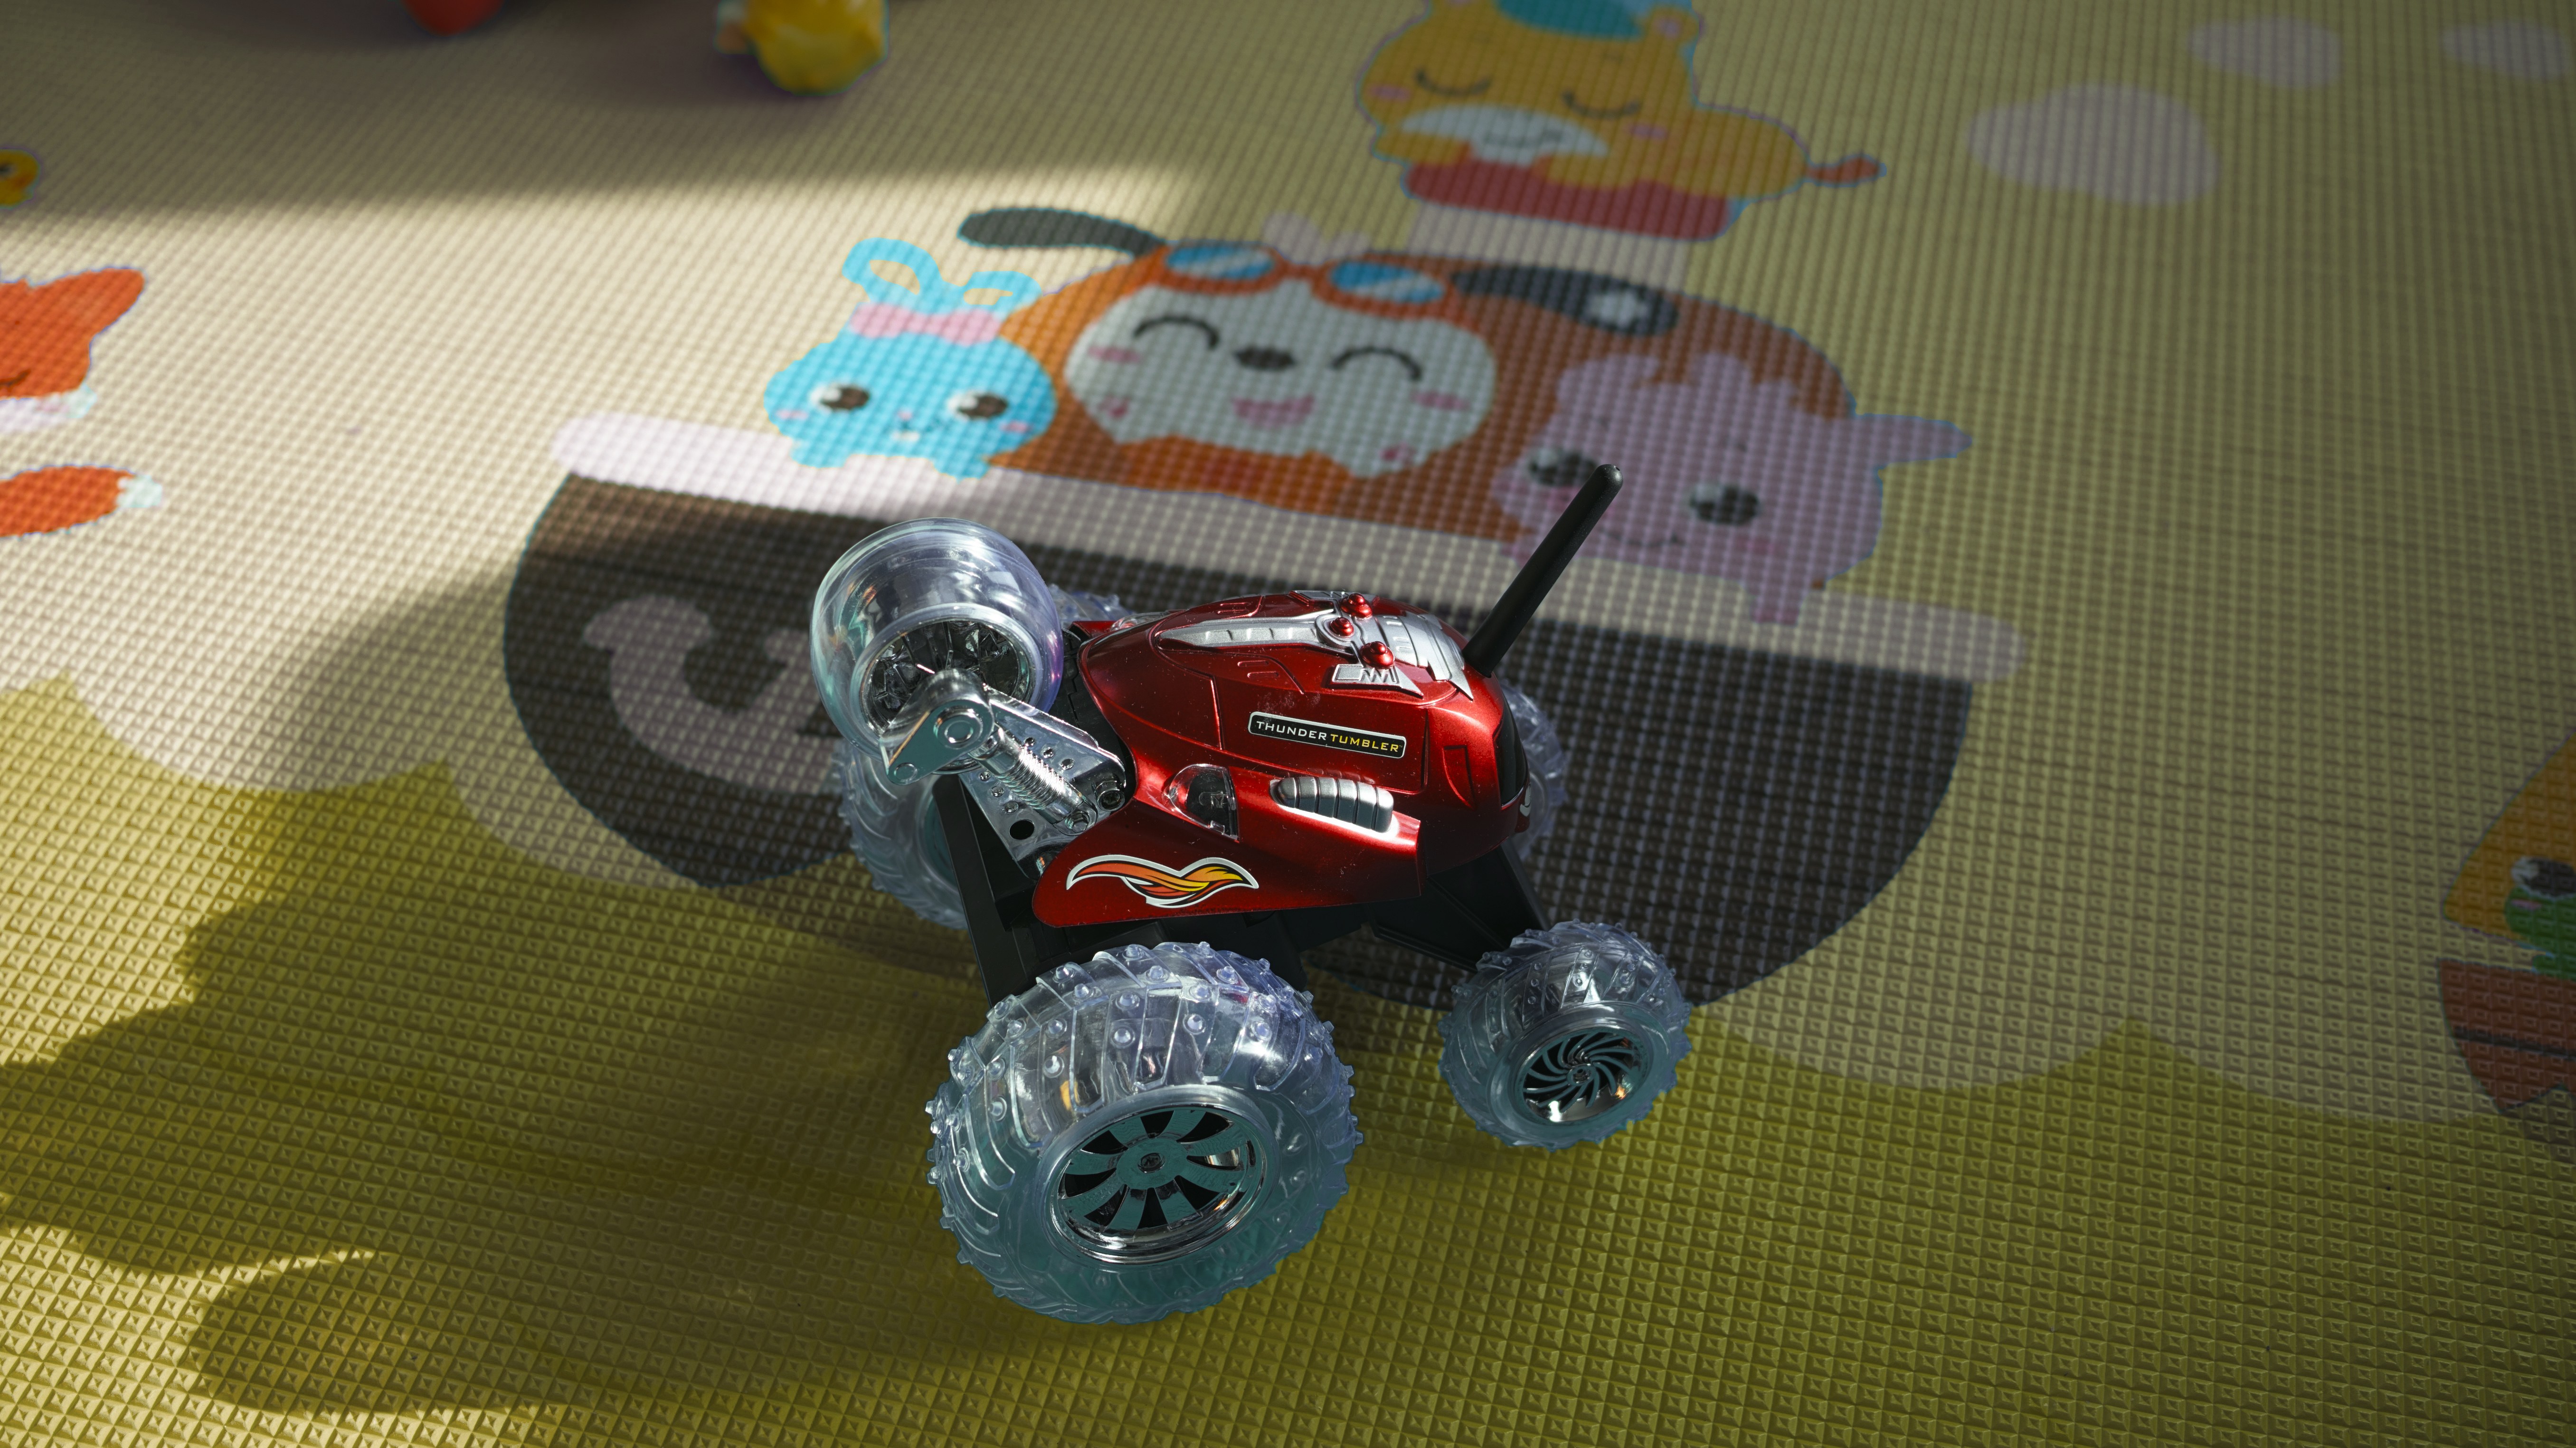
The problem: I can't seem to get rid of the blue fringes around the boats, animals, etc. What I did: 1. Made two selections, one for the vehicle, and one for the boats, animals, etc. 2. Created two adjustment layers and applied them to the blue part of the mat and the vehicle, respectively. 3. Added a mask to the first adjustment layer to protect the original colors of the boats, animals, etc. 4. Tried contracting, expanding and feathering the edges but none of them really worked. Please see the screenshot below. 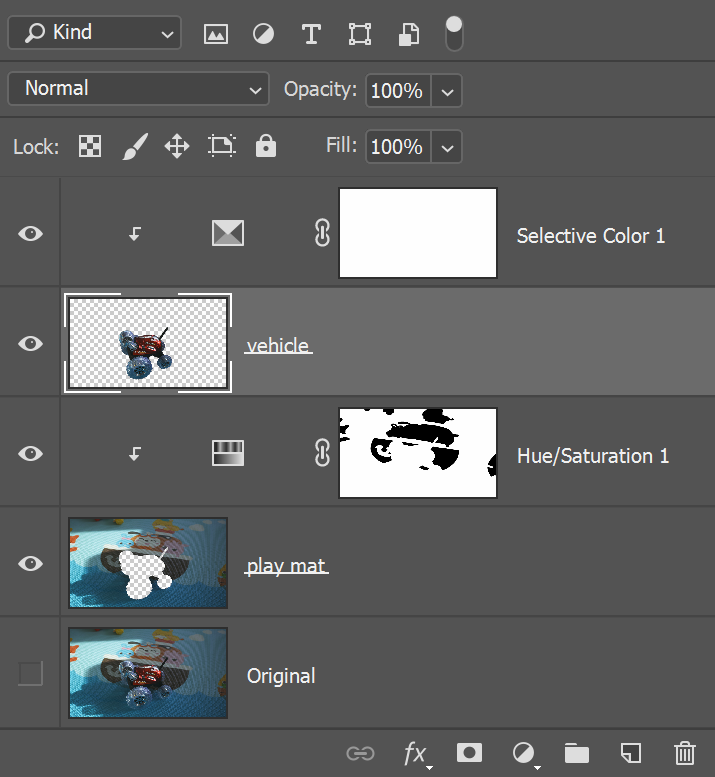
Here are the two selections. 
I wanted to upload the PSD file but had to give up because it is too big. With all the images posted here, it would be easy for anyone to rebuild the project. Any help would be appreciated! |
Posted on 09/03/19 12:41:00 PM |
|
Nick Curtain
Model Master Posts: 1802 Reply |
Re: how to get rid of the fringe
I think the feather in the mask is the issue here and the effect is doubled when you have two feathered selections next to one another. I had to copy the image and zoom in considerably to see what you meant, but having done so it is quite clear. Try this: Create a new layer and set the blend to colour. Go back to the edited final image layer and ALT click on the darker colour with the brush tool selected. Return to the colour layer and with a small brush paint just inside the edge of the lighter colour (where it's blue). You will have to reselect the colour as you go along because the colour changes, particularly where the mat falls into sunlight. Having worked on this I have to say that the results are not perfect, but when zoomed out most people are very unlikely to see the subtle difference. However, it will be far less obvious than the blue. Finally, the clear plastic wheels of the vehicle have picked up the blue of the mat and should ideally reflect your new colour. Create a Hue and Sat adjusment and select Cyans from the drop down menu. Change the Hue to around 133 and pick up the Plus eyedropper and click around the wheel in the cyan area to select the appropriate range of colours. You will see the pointers in the sliders below move to reflect that range and the lines outside of this will determine what colours outside the range are affected also. Fill the adjustment layer with black and paint in white over the wheel area to reveal the changes. Once the areas to be changed have all been selected (and you may require different adjustment layers to cater for the whole vehicle ) you can then alter the sliders to achieve the desired result. Hope this helps. Nick |
Posted on 10/03/19 10:09:10 PM |
|
larkspur
* Posts: 7 Reply |
Re: how to get rid of the fringe
Hi Nick, Thank you very much for the detailed instructions. I tried your method of correcting the colors of the edges and yes it worked. I am not done with the correction yet for it looks the process will take a while. I was hoping there was some kind of quick and dirty trick but I am nonetheless pleased with the learning. As for the plastic wheels, once I change the hue to 133 they would turn purple. I guess I need to go back to my "HotChip" book and go over the section about Hue/Saturation. 
Thanks again for the help! |
Posted on 11/03/19 5:28:07 PM |
|
Nick Curtain
Model Master Posts: 1802 Reply |
Re: how to get rid of the fringe
Glad the information helped. Try minus 133, i.e. drag the slider to the left. You could also try desaturating the wheels and painting in colour, as not all of the wheel picks up the tint from the mat. Nick |
Posted on 11/03/19 9:07:30 PM |
|
Steve Caplin
Administrator Posts: 7180 Reply |
Re: how to get rid of the fringe
My approach to this would be to make a new layer set to Color mode, and paint on there with a brush at low opacity. It would certainly help when painting the tint over the bottom of the wheels. |
Posted on 13/03/19 03:58:40 AM |
|
larkspur
* Posts: 7 Reply |
Re: how to get rid of the fringe
Thank you Nick and Steve! Nick, now I think I fully understand what you said about the Hue/Saturation layer. It's a very powerful adjustment tool if used properly. And Steve, I have tried your method as well and I like it. The wheels changed color the way I wanted it to be as I painted over them on the new layer set to Color. |
Posted on 08/03/20 7:09:47 PM |
|
mariah
* Posts: 11 Reply |
Re: how to get rid of the fringe
I think you did great. I can see a perfect background color change. |