
| » Forum Index » Readers' gallery » Topic: Retouching |
|
Posted on 01/04/09 09:20:54 AM |
|
GKB
Magical Montagist Posts: 4181 Reply |
Retouching
I was recently given this 6x6 cm transparency of my wife (waving) taken at Dusseldorf in the early 1960s....when people wore suits and ties when they flew anywhere. 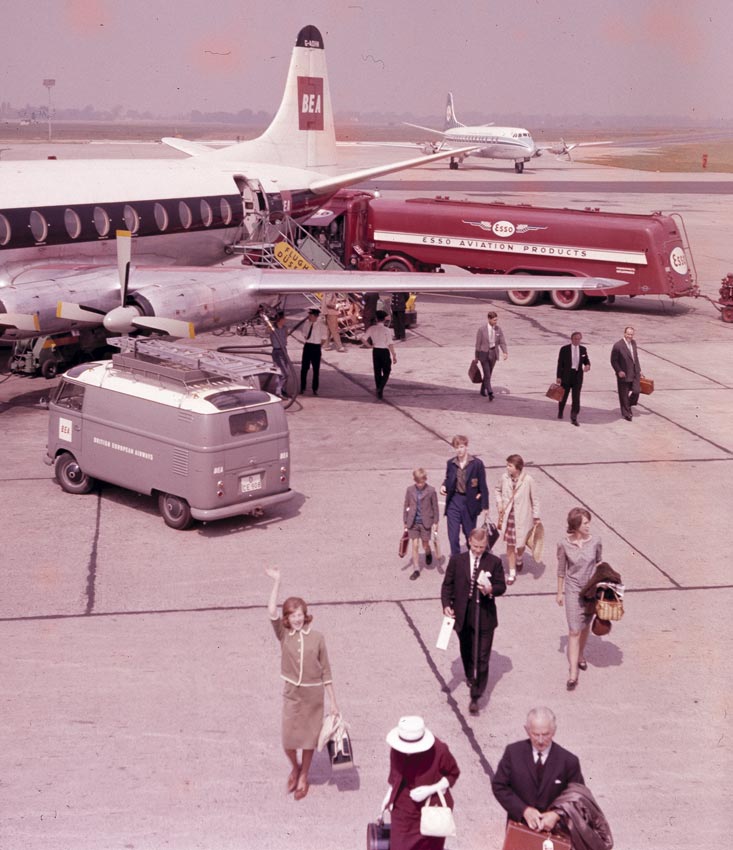
After an hour or so of tweaking this is the new image. It's still not perfect but it's a lot better than before. 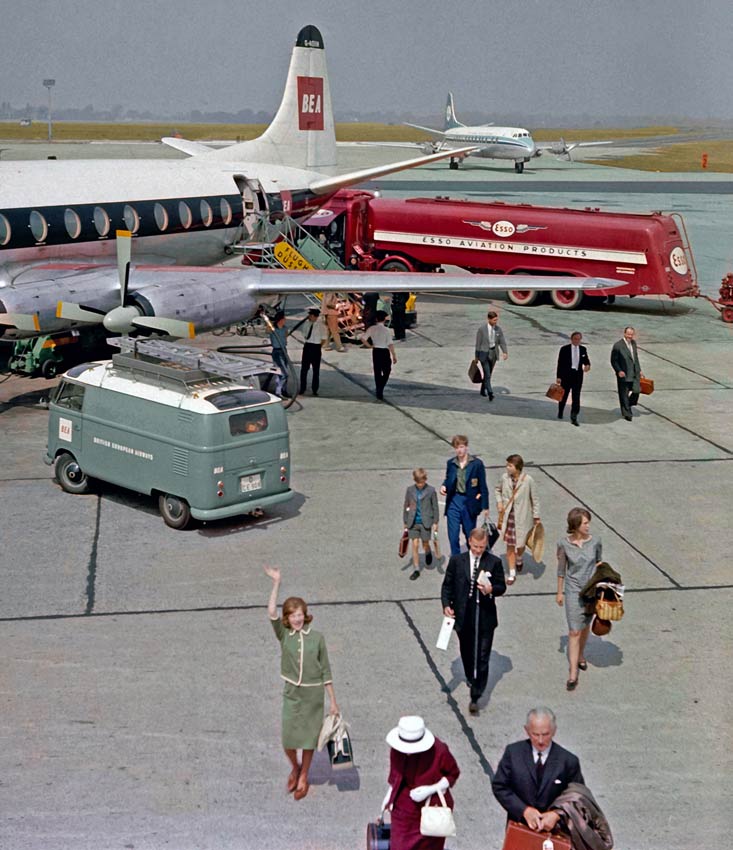
_________________ Maturity is knowing when and where to be immature |
Posted on 01/04/09 09:21:20 AM |
|
GKB
Magical Montagist Posts: 4181 Reply |
Re: Retouching
_________________ Maturity is knowing when and where to be immature |
Posted on 01/04/09 10:58:32 AM |
|
The Mad Lep
Four-Leafed Fantasist Posts: 323 Reply  |
Re: Retouching
Good job Gordon! That looks so much better now the red is taken out.  |
Posted on 01/04/09 11:17:50 AM |
|
tooquilos
Wizard of Oz Posts: 2992 Reply |
Re: Retouching
Ok Gordon, tell me your secret!! Ive tried everything i know(which isn't a lot) and I cant replicate your results. Id love to know how u did it, as the slides im working on, at present, all have either a red or blue colourcast on them, similar to your original one. thank Gordon! _________________ Dorothy: "there's no place like home!" |
Posted on 01/04/09 11:55:06 AM |
|
katew
Virtual Virtuoso Posts: 681 Reply |
Re: Retouching
Great job, Gordon. I'm guessing that whatever you did involved channels. |
Posted on 01/04/09 3:25:41 PM |
|
GKB
Magical Montagist Posts: 4181 Reply |
Re: Retouching
Thanks Kate and Anna. Kate; yes I did use channels but perhaps not quite in the way you might think. The first thing I did was to run Image>Adjustments>Auto Colour which gave it an immediate and enormous improvement and got rid of much of the red cast and then adjust the levels. It still left a lot of those red splodges, though. I left tackling those until later. Next I converted it to Image>Mode>Lab and worked on a duplicate of the background layer for safety. Using a curves adjustment layer on the a channel I enhanced the colour on this layer. In Lab mode the a channel controls red and green while the b channel controls blue and yellow. Lab dont work like that there RGB stuff yknow! With the a channel I moved the top right adjustment two squares to the left and the bottom left adjustment two squares to the right. Its essential for the curve to go through the centre point of the grid otherwise you get a colour cast. The curves grid was set to 10 x 10. I did not adjust the lightness or the b channel. This has the effect of boosting the red of the fuel bowser and the dress of the lady at the bottom of the image .and those red splodges!! Flatten the image and return to Image>Mode>RGB From here I sampled colours adjacent to the red splodges and used a soft edged brush set to colour to paint out the splodges in the sky and apron areas. The grass was brightened using the same technique. There was still a trace of red in the image at this point so a curves correction was applied to get rid of the last of this. After that it was all down to the spot healing brush for a while. The original transparency was shot on an early Agfa film which tended to be rather grainy so I ran Filter>Noise>Median at a low value of just 2 pixels for the original scan to get rid of as much of the grain as possible without changing the image too much. As this slightly blurred the edges I then used an edge sharpening technique using a copy of the entire image pasted into a new Alpha channel and ran Filter>Stylise>Find Edges. Adjust levels to enhance those edges and make the channel more contrasty. Then blur it very slightly using Gaussian Blur. Adjust levels again and then invert the image to give white lines against black. Cmd/Ctrl- click on the channel icon to load as a selection and then go back to the main RGB layer and sharpen the selected edges. You might want to hide the marching ants (Cmd/Ctrl H) when you do this as it makes things easier to see. You might want to play around a bit more to enhance some of the colours. Foer example I sampled a green colour from Sylvias skirt and jacket and painted this using a small soft-edged brush set to colour. This made quite a difference from the rather sludgy green that was there before. I didnt take notes as I did the re-touching so I may have missed out a step or three but this gives you a fair idea of how I went about it. _________________ Maturity is knowing when and where to be immature |
Posted on 01/04/09 3:45:57 PM |
|
katew
Virtual Virtuoso Posts: 681 Reply |
Re: Retouching
Thanks Gordon. I've yet to get to grips with using LAB - sounds like it will be my next project! |
Posted on 01/04/09 4:19:59 PM |
|
GKB
Magical Montagist Posts: 4181 Reply |
Re: Retouching
Kate, A very good book is Photoshop Lab Color: The Canyon Conundrum and Other Adventures in the Most Powerful Colorspace by Dan Margulis. It's complex subject to get your head around and it bears no resemblance to operating within nice, safe, comfortable RGB but it is a very powerful tool to get to know. You'll be amazed at how to enhance colour and sharpness along with other more complex ideas. I've had it for a couple of years, now............still don't understand it!!?? _________________ The meek shall inherit the Earth if that's ok with the rest of you. |
Posted on 01/04/09 11:09:09 PM |
|
tooquilos
Wizard of Oz Posts: 2992 Reply |
Re: Retouching
Hi Gordon, That was going to be my thing that I was going to try   
How on earth does someone even think of these steps? Thank you so much Gordon for sharing this. Ill give it a go later today and post my results. This forum is a wealth of knowledge. Wonderful. _________________ Dorothy: "there's no place like home!" |
Posted on 01/04/09 11:11:56 PM |
|
GKB
Magical Montagist Posts: 4181 Reply |
Re: Retouching
I wonder myself sometimes! _________________ Why is the word 'Abbreviation' so long? |
Posted on 02/04/09 04:52:55 AM |
|
tooquilos
Wizard of Oz Posts: 2992 Reply |
Re: Retouching
Here's my attempt at using your instructions Gordon, Overall, I am pleased with the outcome - vast improvement on the original but I feel its lacking oomph in colour. What appealed to me about yours was the vibrancy of the image and colours. Can you see anyway similar results can be achieved on this image? Anna 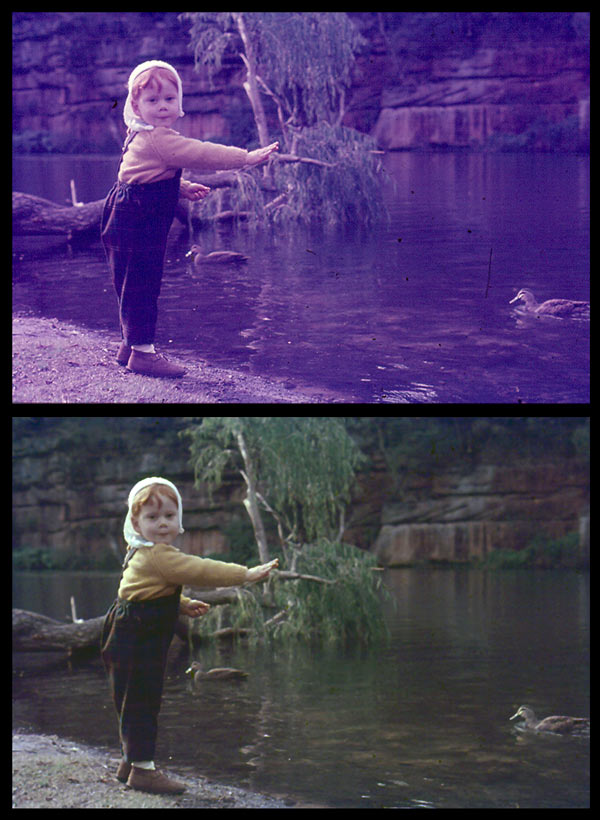 _________________ Wicked Witch of the West:I'll get you, my pretty! And your little dog, too! |
Posted on 02/04/09 05:44:22 AM |
|
tooquilos
Wizard of Oz Posts: 2992 Reply |
Re: Retouching
I just played around with curves and levels....not entirely sure if its made it better or worse? 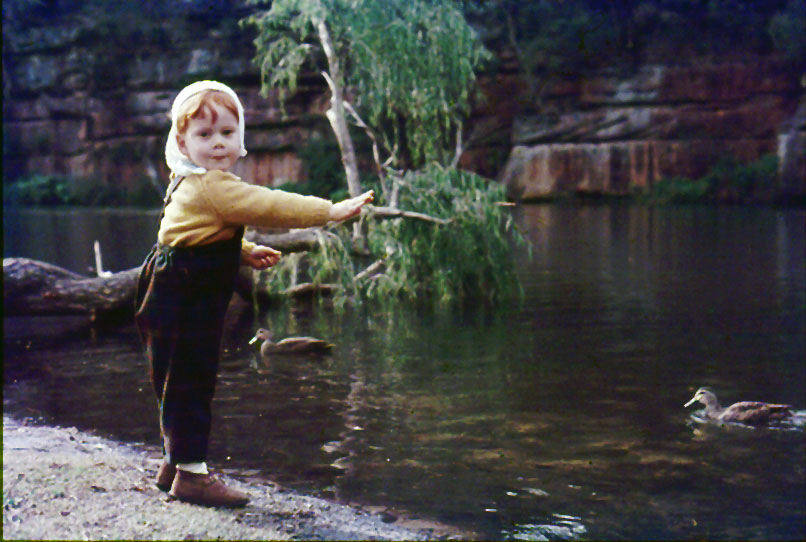 _________________ Dorothy: Toto, I've a feeling we're not in Kansas anymore |
Posted on 02/04/09 08:31:29 AM |
|
GKB
Magical Montagist Posts: 4181 Reply |
Re: Retouching
Anna, Using the first retouched image as a basis try going to Image>adjustments>hue/saturation and tweak the saturation up a little. Alternatively go back into Lab and select curves. In the a channel move the top right slider to the left and the bottom left slider to the right by a couple of squares. This will improve both the red and the green in the photograph. Check your PMs. Gordon _________________ The meek shall inherit the Earth if that's ok with the rest of you. |