
| » Forum Index » Reader's Tutorials » Topic: A very simple aid for plotting perspective in a photo. |
|
Posted on 29/06/18 5:32:48 PM |
|
DavidMac
Director of Photoshop Posts: 6097 Reply  |
A very simple aid for plotting perspective in a photo.
A SIMPLE PERSPECTIVE AID This is a very simple technique to help plot perspectives. It quite simply draws conical grids centred on a vanishing point. It is suitable for all images where vanishing points are in the image or not too far outside the edge. Very distant vanishing points a long way outside the image do not lend themselves well to this technique. I am assuming very basic knowledge of vanishing points and basic PS competence including simple straight line pen paths. No advanced knowledge is needed. For clarity and simplicity this example uses a single vanishing point but with multiple vanishing points the same technique can produce separate grids for each vanishing point each on their own layers which can be switched on or off. Here is a picture of a corridor in Versailles. Using the pen tool draw a path(s) which traces two (or more) parallels in the image to their common vanishing point. Be careful to only click with the pen and not drag as we want straight lines only. Once you have drawn the path you can use the direct selection tool to refine it to fit exactly. I have used the bottom of the column bases on the left and the tops of the column bases on the right as my references. Here is my path. 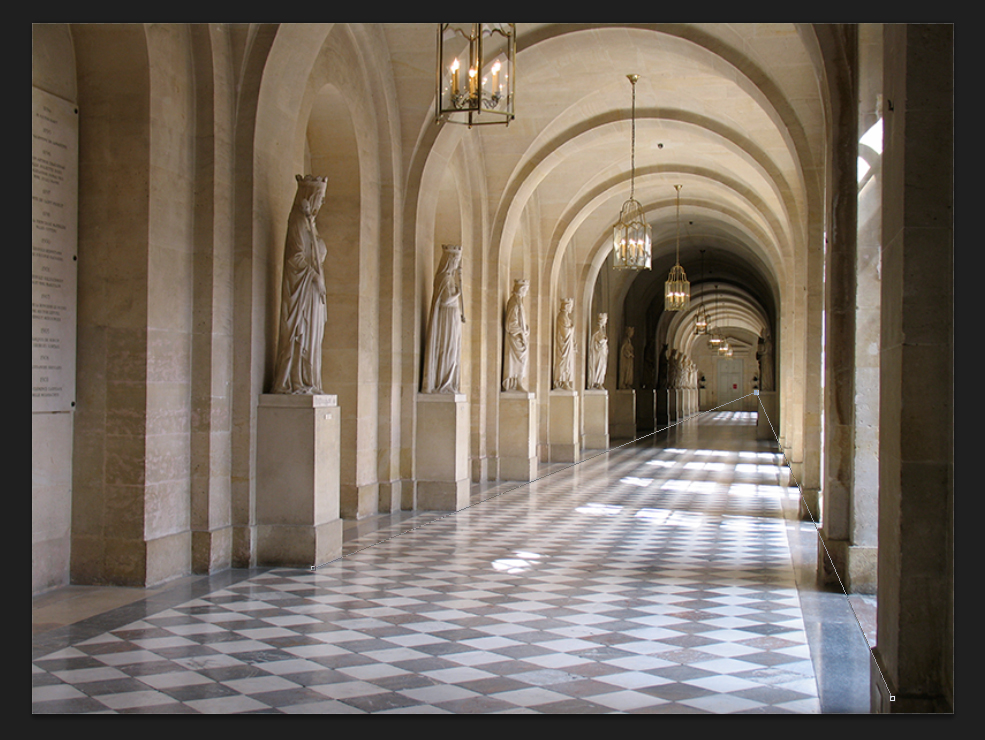
Now select the polygon tool. Make sure the following properties are set in the context tool bar. Type: Shape. Fill: None. Stroke Red (or colour of your choice) Points: According to image size. In the dropdown settings: Uncheck Smooth Corners and Smooth Indents. Check Star and set Indent sides to 99%. Finally set Sides to 100. 
Now for the fun bit. Place the cursor on the vanishing point defined by the path and drag to the left until your grid fills the image. These settings of the polygon tool will produce a grid of one hundred guidelines radiating from the vanishing point. 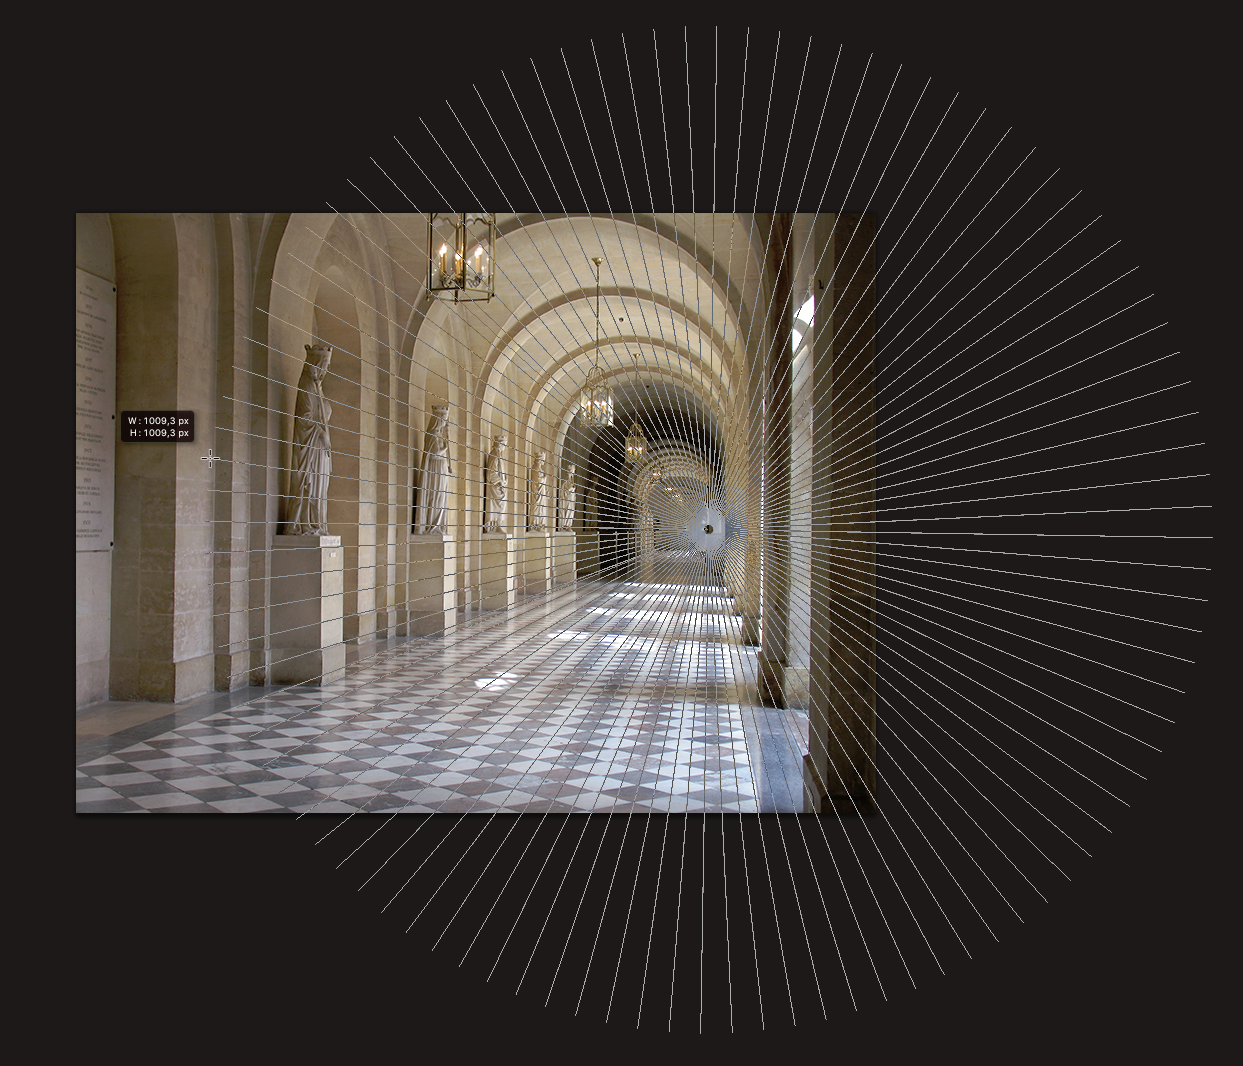
Repeat on new layers for other vanishing points if needed. It is now much, much easier to size and distort objects to fit your image. 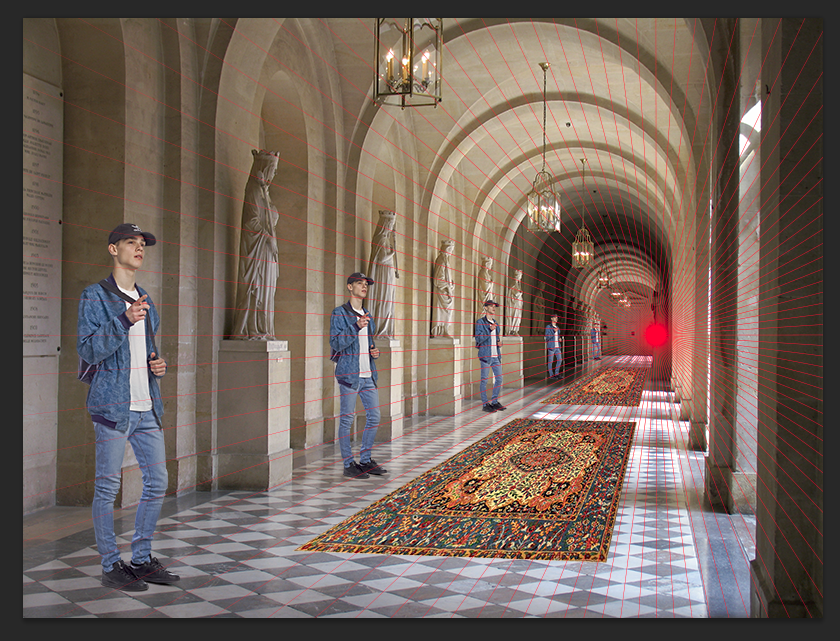
Thats all there is to it. A simple tool simply applied. Have fun _________________ The subtlety and conviction of any Photoshop effect is invariably inversely proportional to the number of knobs on it ....... |