
| » Forum Index » Problems and solutions » Topic: Tunnel Shape Interior |
|
Posted on 08/02/22 1:51:24 PM |
|
tom8gem@gmail.com
* Posts: 50 Reply |
Tunnel Shape Interior
I'm working on an illustration that incorporates a number of techniques used in Steve's books. In HTCIP, there's a chapter on wrapping wood around a cylinder shape; I'd like to do something like the inverse of that, wrapping wood planks to the interior of a 3D tunnel, with perspective. I'm not finding tutorials on that; would anyone be able to point me in the right direction? Here's an image that conveys something similar to what I'd like to replicate: https://bloximages.chicago2.vip.townnews.com/siouxcityjournal.com/content/tncms/assets/v3/editorial/e/4e/e4e259d8-521e-54d1-8a18-c0fc76724647/4f4b9cd74f75d.image.jpg Thank you in advanceI much appreciate it! |
Posted on 08/02/22 1:52:55 PM |
|
tom8gem@gmail.com
* Posts: 50 Reply |
Re: Tunnel Shape Interior
Like this: 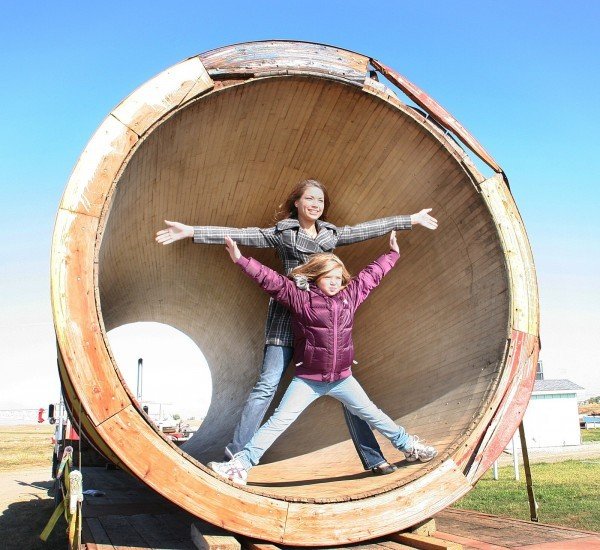
|
Posted on 08/02/22 8:42:58 PM |
|
GKB
Magical Montagist Posts: 3993 Reply |
Re: Tunnel Shape Interior
Hi Tom Doing this in Photoshop would be complex and the results may not be quite as you might wish. If you have CS6 Extended you might be able to do it in Photoshop 3D but I cannot really say if this would help much. This is really in the realm of a proper 3D program where you simply create a tube object and apply an appropriate wood material to it. Blender is a very good, free, programme but, as with all 3D programmes it has a steep learning curve. Sorry I cant be more helpful. _________________ Time flies like an arrow but fruit flies like a banana. |
Posted on 08/02/22 9:20:05 PM |
|
DavidMac
Director of Photoshop Posts: 5654 Reply  |
Re: Tunnel Shape Interior
Gordon (GKB) is quite right. This really is not easy within Photoshop it does rather call for 3D. However, here is a primitive and relatively easy Photoshop suggestion that might just do the trick. It's a workaround, but anyone who has used Photoshop for any period of time will know that workarounds are often the life blood of Photoshop. So here we go ....... Import a wooden texture that you like for the interior to an image layer. If it isn't already, make it into a Smart Object. Layer > Smart Objects > Convert to Smart Object. (This isn't strictly necessary but the quality will be better) Enter free transform. Edit > Free Transform. Rotate so the planks run vertically. Stay in free transform mode. 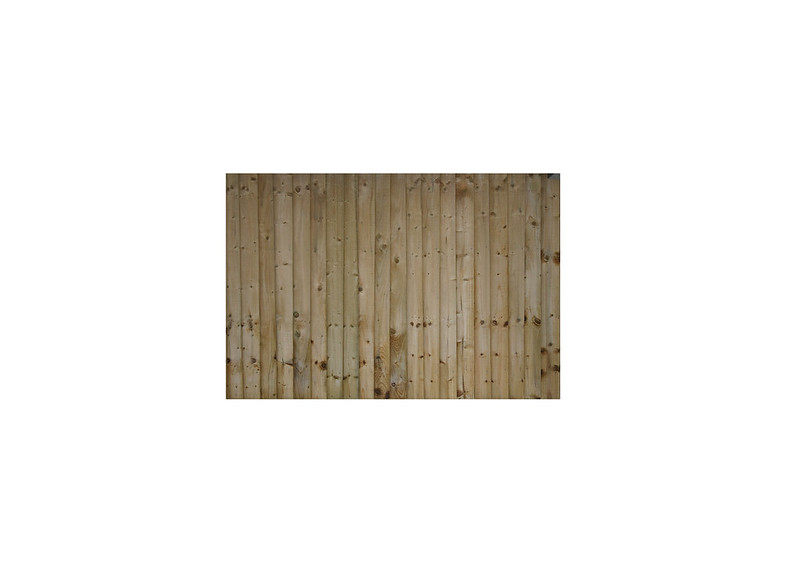
Now click the little curved Warp button on the property bar. 
Further to the left on the property bar a Warp dropdown menu will appear. Select Arc. 
Now pull the little white box on the image grid as far as it will go to create a semi circle. 
Click the warp button again to return to Free Transform. If necessary reduce the size of the semi circle and apply the transform. Duplicate the layer and flip the top layer vertically. Edit > Transform > Flip Vertical Arrange the two semicircles to create a circle. 
Select both layers and merge them. Layer > Merge Layers Merging will turn the smart object into an ordinary pixel layer. At this point it would be a good idea to turn it back into a Smart Object for the same reasons as above. Layer > Smart Objects > Convert to Smart Object. You now have the basis of your interior cylinder. The relationship of hole to overall diameter derives from the shape of the original rectangle so some experimentation will be needed.
If you want the hole off centre, as in your example, enter Free Transform again and click the Warp Button once more. This time make sure the Warp dropdown menu is set to Custom. The next bit is tricky and fiddly. Select the centre of the blue grid where the lines intersect and drag downwards. 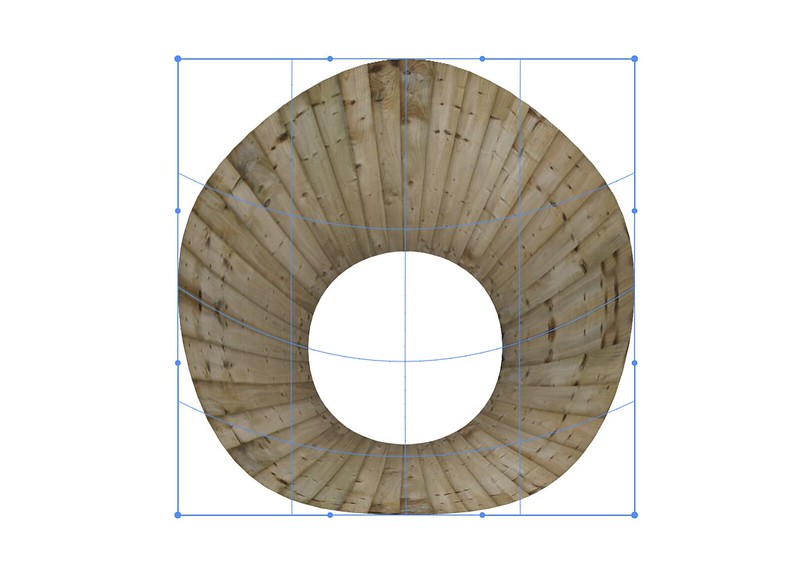
The circular shape will become somewhat distorted. You will need to correct this as best you can by eye using the outer handles. 
I appreciate that this method is less than ideal and lacks proper geometric precision, but it is reasonably simple. If the tube is filled with people or other objects the lack of absolute precision is likely to be quite acceptable. Obviously you need to size, insert and crop as required. NOTE If you need to make the hole a lot smaller, then before the final warp stage, you can duplicate the layer and transform the lower layer to a smaller size. 
Add an empty mask to the upper layer withe mask button at the bottom of the Layers Palette. 
Now with a soft black brush soften the edges of the join. 
If you want you can fine tune this with a curves layer to match densities more precisely. 
Once you are happy merge the layers and proceed to the final warp. This is definitely a bit of a compromise. But I really think it should serve until something better comes along. I have no idea at what level of Photoshop you are but if you want more clarifications please feel free to ask. _________________ The subtlety and conviction of any Photoshop effect is invariably inversely proportional to the number of knobs on it ....... |
Posted on 09/02/22 02:33:06 AM |
|
tom8gem@gmail.com
* Posts: 50 Reply |
Re: Tunnel Shape Interior
Thanks, that's all good to know. I did find a short video tutorial on how to do this in Blender, but it assumed prior knowledge of the app ("you can do this with a few clicks"), and it looked complicated to learn Blender, as you say. I gather Adobe discontinued PS 3D, so I may try the workaround below. |
Posted on 09/02/22 02:36:02 AM |
|
tom8gem@gmail.com
* Posts: 50 Reply |
Re: Tunnel Shape Interior
Thank you, David; this is very helpful. As I replied to Gordon, Blender seems daunting to learn, and since Adobe discontinued PS 3D, I intend to try your workaround. I really appreciate your taking the time to outline these steps, thanks so much! |
Posted on 09/02/22 08:12:36 AM |
|
DavidMac
Director of Photoshop Posts: 5654 Reply |
Re: Tunnel Shape Interior
To be honest I was intrigued to see if I could find a PS solution. Its learning for me too. _________________ The subtlety and conviction of any Photoshop effect is invariably inversely proportional to the number of knobs on it ....... |
Posted on 09/02/22 08:12:38 AM |
|
DavidMac
Director of Photoshop Posts: 5654 Reply |
Re: Tunnel Shape Interior
Double post removed. _________________ The subtlety and conviction of any Photoshop effect is invariably inversely proportional to the number of knobs on it ....... |
Posted on 09/02/22 09:47:24 AM |
|
GKB
Magical Montagist Posts: 3993 Reply |
Re: Tunnel Shape Interior
Ok so I hate being defeated so I lay awake thinking of this problem and came up with this. Take a straight image of vertical wooden boards. Now increase the canvas size by, say, four times and line up the boards edge to edge so that you now have an image that is the same height as previously but is now four times as wide. crop the image to exclude any of the background that does not contain the wood. Go to Image>Canvas Size and make the width the same as the height. You should now have a square image. This is not strictly necessary and you can experiment with keeping a wide image for any other adjustments you might want to try. Next go to Filter>Distort>Polar co-ordinates and ensure that 'Rectangular to Polar' is selected. Now create a circular selection to cut a hole in the centre of the image. Add a background of choice to view through the hole and shade the wood to create shadows. I used a 50% grey layer set to Hard Light and then used a large soft brush at around 8% opacity to add shade. You could distort the image to offset the hole in perspective. I can see many variations in this technique but I have to walk the dog now so go ahead and try it. 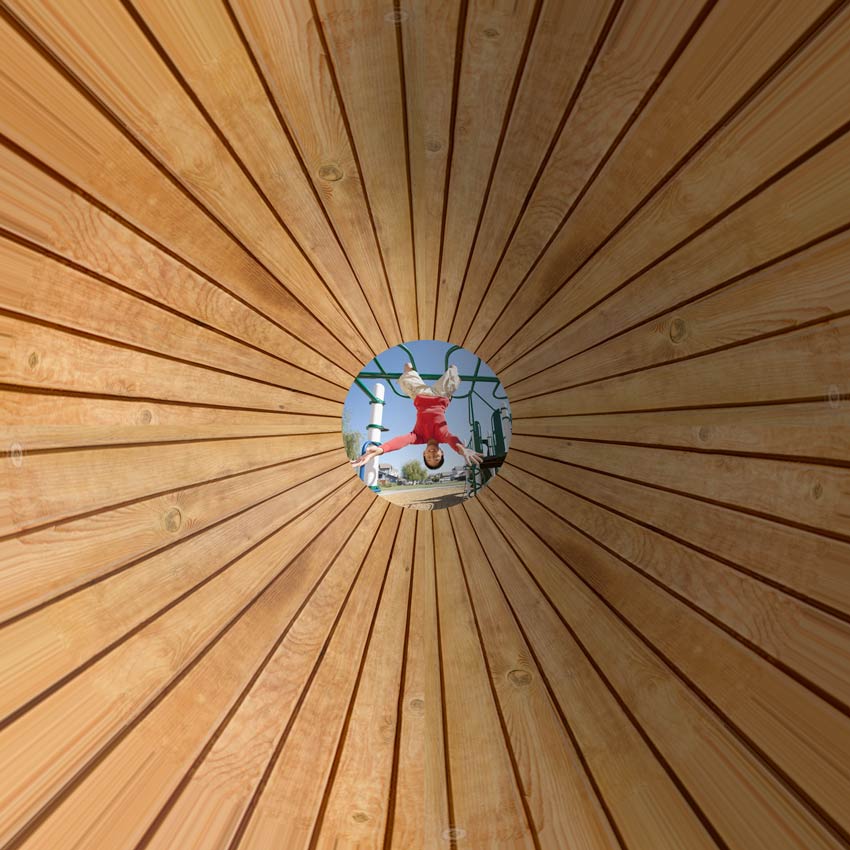
_________________ Time flies like an arrow but fruit flies like a banana. |
Posted on 09/02/22 09:55:41 AM |
|
GKB
Magical Montagist Posts: 3993 Reply |
Re: Tunnel Shape Interior
This shows an image that was kept a 4x the width for comparison 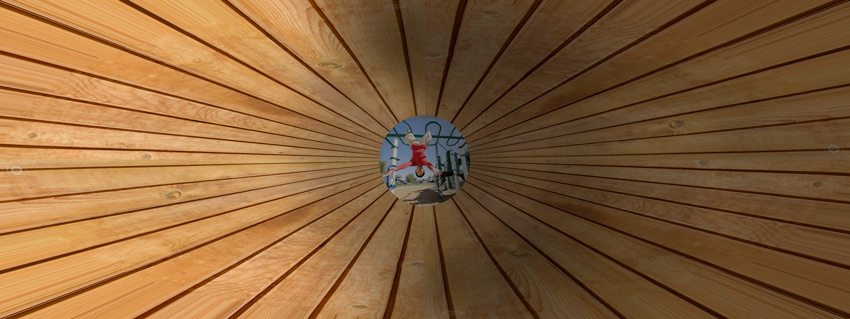 _________________ Time flies like an arrow but fruit flies like a banana. |
Posted on 09/02/22 10:21:54 AM |
|
DavidMac
Director of Photoshop Posts: 5654 Reply |
Re: Tunnel Shape Interior
Yes I wondered about Polar too, but it's a filter I always found hard to predict and control. So I didn't follow through with it. Now I just had a go. This does work and it's very simple. Excellent Gordon! Take a look at this Tom. It's easier than my proposal. For asymmetric distortion to set the hole away from centre use just the last part of my earlier suggestions. They would still apply. _________________ The subtlety and conviction of any Photoshop effect is invariably inversely proportional to the number of knobs on it ....... |
Posted on 09/02/22 2:39:20 PM |
|
GKB
Magical Montagist Posts: 3993 Reply |
Re: Tunnel Shape Interior
... and this is what it looks like modelled in Cinema 4D. The edge of the tube requires some work but this shows the difference between Photoshop and a 3D programme 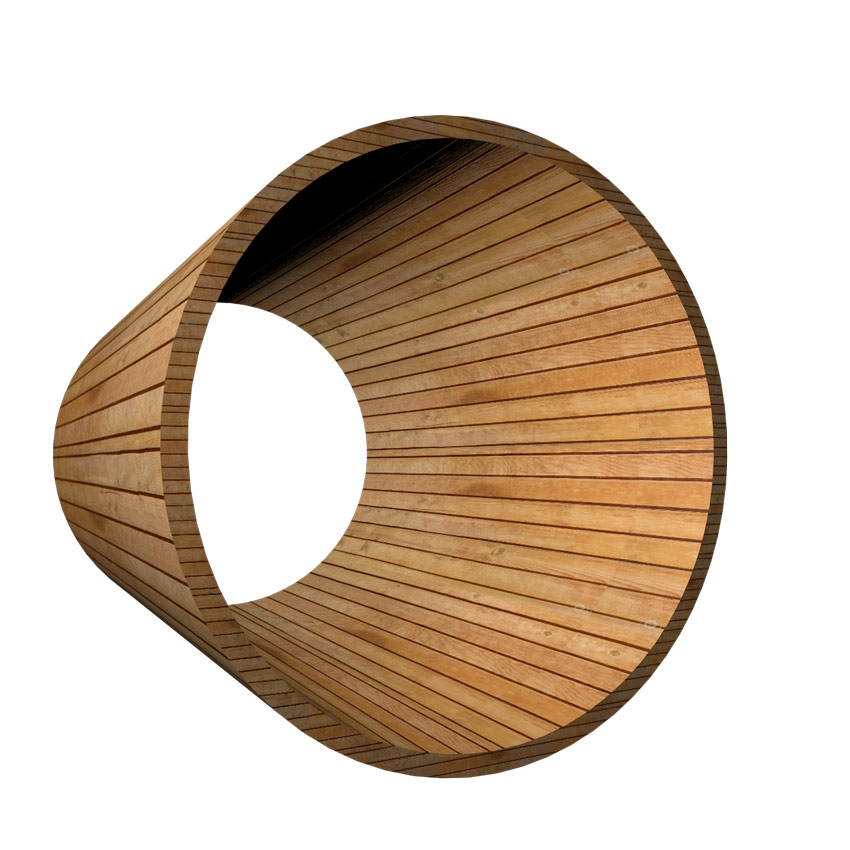
_________________ If at first you don't succeed then skydiving is not for you. |
Posted on 09/02/22 2:41:01 PM |
|
Steve Caplin
Administrator Posts: 7021 Reply |
Re: Tunnel Shape Interior
Ingenious solution, Gordon! |
Posted on 09/02/22 3:37:17 PM |
|
tom8gem@gmail.com
* Posts: 50 Reply |
Re: Tunnel Shape Interior
WOW, this looks great! Many thanks to you all, can't wait to try this approach! It may take some time to finish the overall piece, but I hope to eventually post it in this forum when it's ready! |
Posted on 11/02/22 1:46:23 PM |
|
Steve Caplin
Administrator Posts: 7021 Reply |
Re: Tunnel Shape Interior
We'd love to see what you do with it, Tom. |
Posted on 13/03/22 03:06:31 AM |
|
tom8gem@gmail.com
* Posts: 50 Reply |
Re: Tunnel Shape Interior
Hello, my friends; thanks again for all your sound advice. It put me in the right direction, and I wanted to show my finished work to you first. I'm pleased to present the first in a Dark Rides series: The Lion's Lair. I'd be glad to hear any feedback, since I want it to be the best it can be (and I know I'm among masters here). Please see at this URL: http://thomaskugler.com/img/illustration/darkRides-compressed.pdf |
Posted on 13/03/22 7:13:22 PM |
|
tom8gem@gmail.com
* Posts: 50 Reply |
Re: Tunnel Shape Interior
PSThe JPG came out looking better than the compressed PDF, http://thomaskugler.com/img/illustration/darkRides.jpg |
Posted on 14/03/22 09:59:20 AM |
|
Steve Caplin
Administrator Posts: 7021 Reply |
Re: Tunnel Shape Interior
Hi Tom That works well, but I think you're missing a trick: the turn at the end of the tunnel is where you've put the light source, and you could add to the drama of the scene by exaggerating this to make the viewer want to turn the corner to see what's happening: 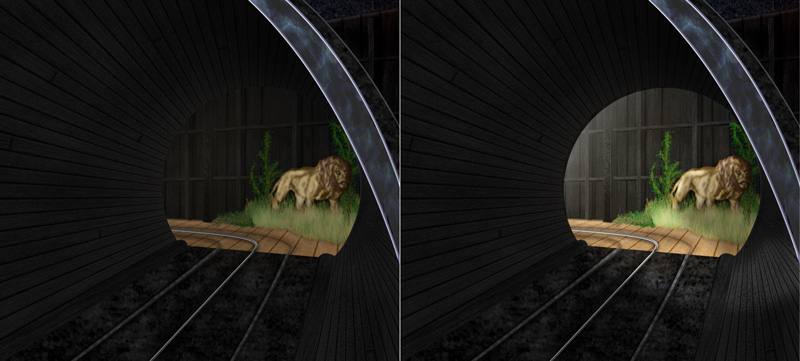 |
Posted on 14/03/22 1:17:19 PM |
|
DavidMac
Director of Photoshop Posts: 5654 Reply |
Re: Tunnel Shape Interior
First off I second Steve's comment. It draws you down the tunnel. You have done a pretty good job of creating the tapered circular effect you wanted for the planking but, on a more technical level, the image does have some issues. To try and make these easily visible I have brightened up the image simply for the purposes of this explanation. Looking at Image 1 the circular tunnel has three main elements. The left side planking, the ground and tracks and the right side planking. In a classic single vanishing point perspective like this they should all share the same vanishing point. I have tried to roughly plot the vanishing point of these three elements. It is not very precisely done but is close enough to explain the problem. Image 2 shows the vanishing point implied by the planking of the left and top of the tunnel. Image 3 shows the vanishing point implied by the ground and tracks and Image 4 the vanishing point implied by the boards on the right side. You can see that each element has its own different vanishing point, which should not be the case. My instincts tell me that the perspectives of No2 and No4 should be adjusted to conform with No3. Since this is a "synthetic" composite with no real photograph to guide us this has to be a very subjective assumption. However it is quite clear that, as it stands, there are perspective anomalies that need correcting. I will be curious to hear what Steve and others have to say about this and whether they would assess it differently. 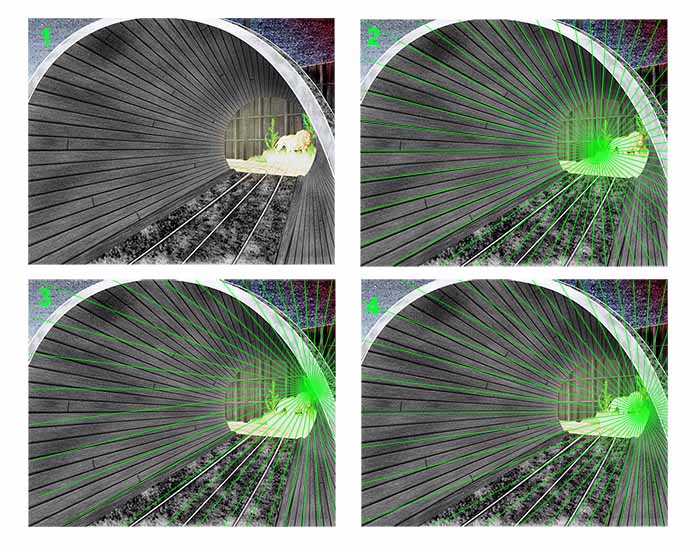 _________________ The subtlety and conviction of any Photoshop effect is invariably inversely proportional to the number of knobs on it ....... |
Posted on 14/03/22 4:32:00 PM |
|
tom8gem@gmail.com
* Posts: 50 Reply |
Re: Tunnel Shape Interior
Thanks Steve, that's a great point. I actually had that light brighter at first, then decided to keep the dark ride dark. But you're right, it does add to the drama, and doesn't take away from anything. I've brightened it up again in the JPG. |
| page: 1 2 3 last |